
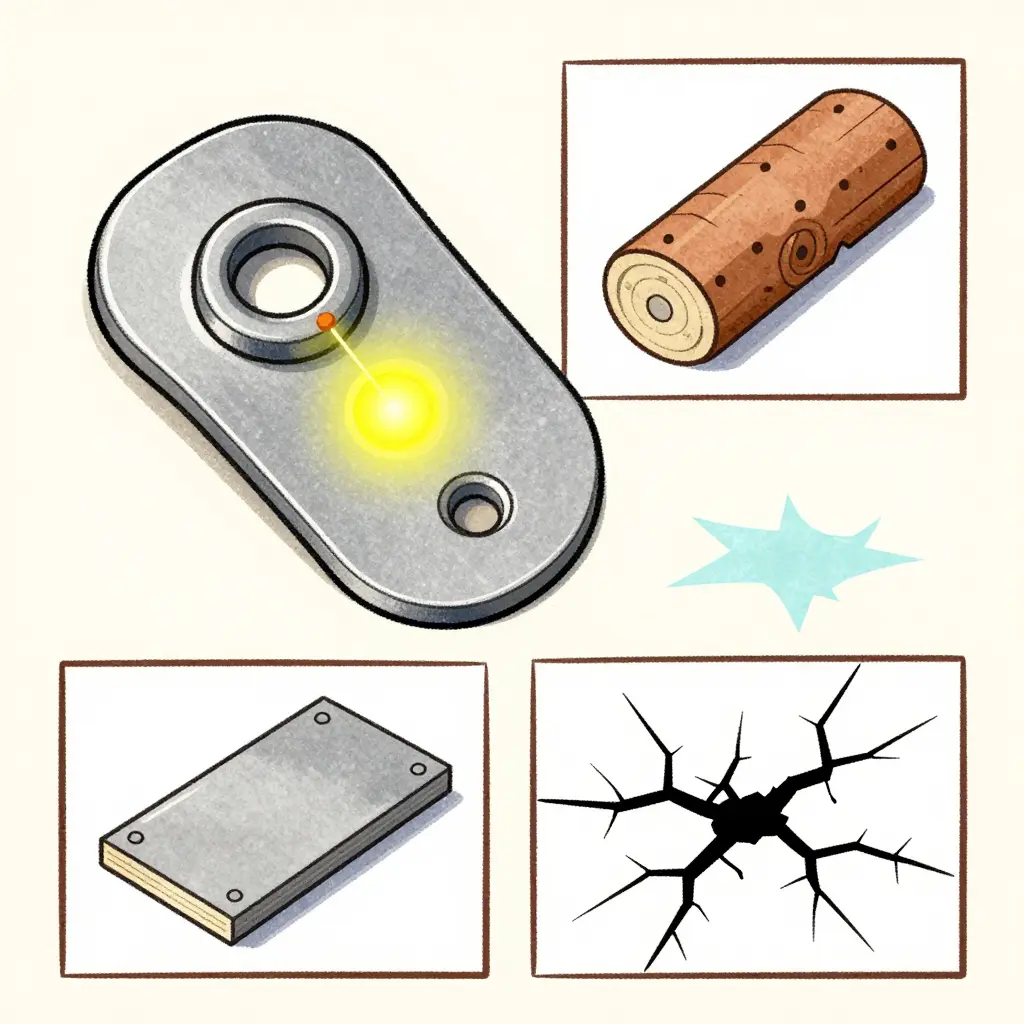
The Mechanics of Stress Concentration at Mounting Tabs
Stress concentration is what happens when a load that should spread across a wide surface gets squeezed into a small one. On a fairing, that squeeze point is almost always the mounting tab. Vibration or impact enters through the fairing mounting tabs, follows a narrow load path, and lands in a cross-section too small to carry it comfortably. More load through less material raises local stress. Higher stress starts a fatigue crack at the weakest geometry, and once that crack is open, every bump in the road pushes it a little deeper.
Three things make it worse.
- Sharp corners. A square inside corner acts as a funnel for stress lines. Instead of flowing smoothly, they bunch up at the point, so the corner can see two to three times the average stress of the surrounding metal.
- Narrow cross-sections. A tab is deliberately thin so it can flex. That thinness also limits how much load it can share, so force ends up concentrated in a small slice of material.
- Off-axis load paths. When vibration arrives at an angle instead of straight through the bolt, it twists and levers the tab, adding bending stress on top of the tension the tab was designed for.
The area mismatch is the real problem. A tab’s cross-section might be a fraction of a square inch, while the panel it holds can span several square feet. Stress is force divided by area, so the same load produces far higher stress in the tab than in the panel. The panel has more material to absorb the hit, which is why panel cracks usually appear later, if at all, and the tab fails first.
The diagram below traces that path, from the incoming load to the first hairline crack.
How Force Concentrates at a Mounting Tab
The schematic below reduces the stress path to a clean line drawing, so you can see why a fairing tab cracks before the panel it is bolted to does.
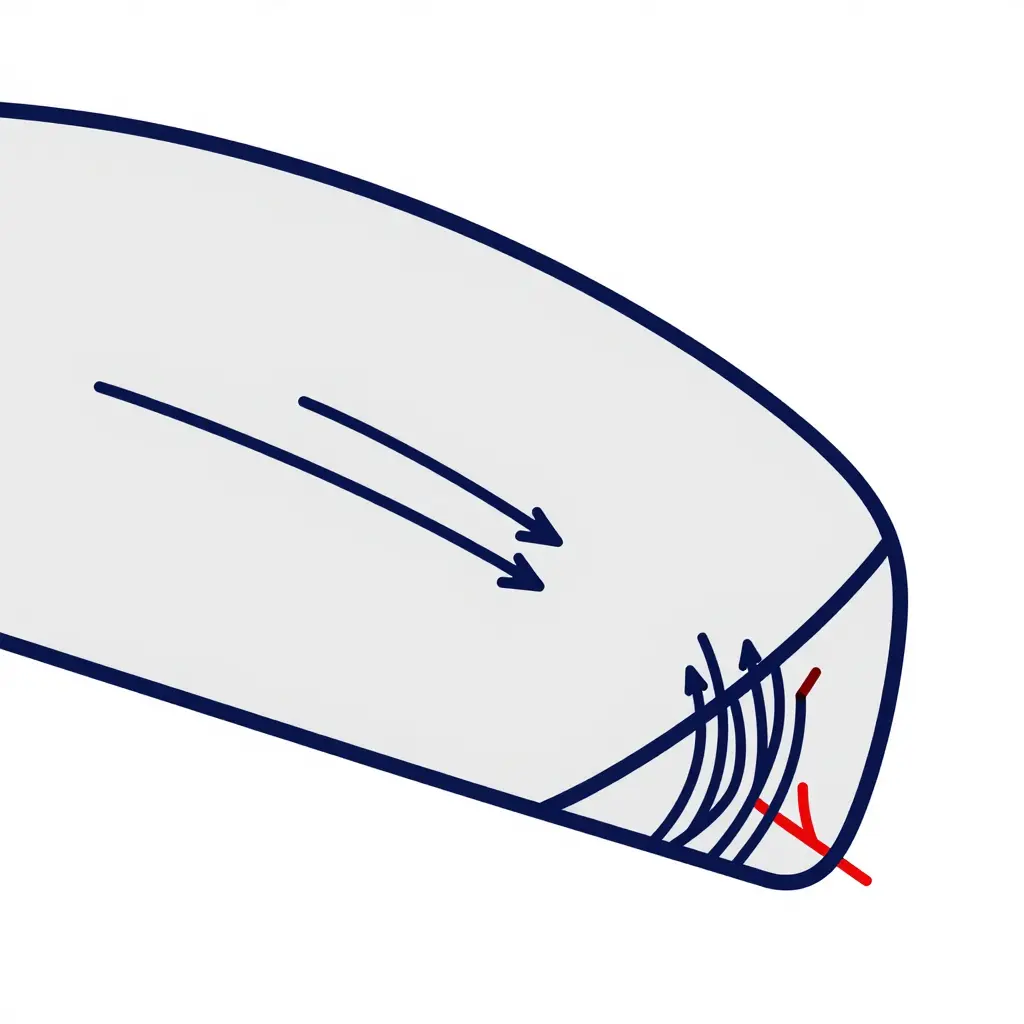
What the Diagram Shows
- The panel outline is the broad, stiff fairing surface that absorbs and spreads load across a wide area.
- The narrow mounting tab is the small leg that bolts the panel to the vehicle. All of the force gathered by the panel funnels through this skinny bridge.
- The directional load arrows trace how vibration and aerodynamic force travel from the panel toward the tab.
- The bunched stress-flow lines at the reentrant (inner) corner show the concentration effect: force squeezes into a tighter and tighter path, multiplying local stress.
- The jagged crack symbol marks the initiation point, the spot where real-world fatigue cracks almost always begin.
The tab does not crack because it is weak. It cracks because a sharp corner forces a small area to carry a big load. That bottleneck explains most tab failures, and it is why a larger corner radius and effective damping help more than simply adding thicker metal.
Why Vibration and Resonance Fatigue Cracks Motorcycle Fairing Tabs First
Every moving vehicle feeds a steady stream of small, oscillating forces into its bodywork. Road texture, drivetrain pulses, and engine combustion all turn into vibration, and that motion has to go somewhere. On a motorcycle, the panels are held in place by a handful of small molded ears – the motorcycle fairing tabs – and those tabs become the narrow funnel the whole assembly’s energy passes through.
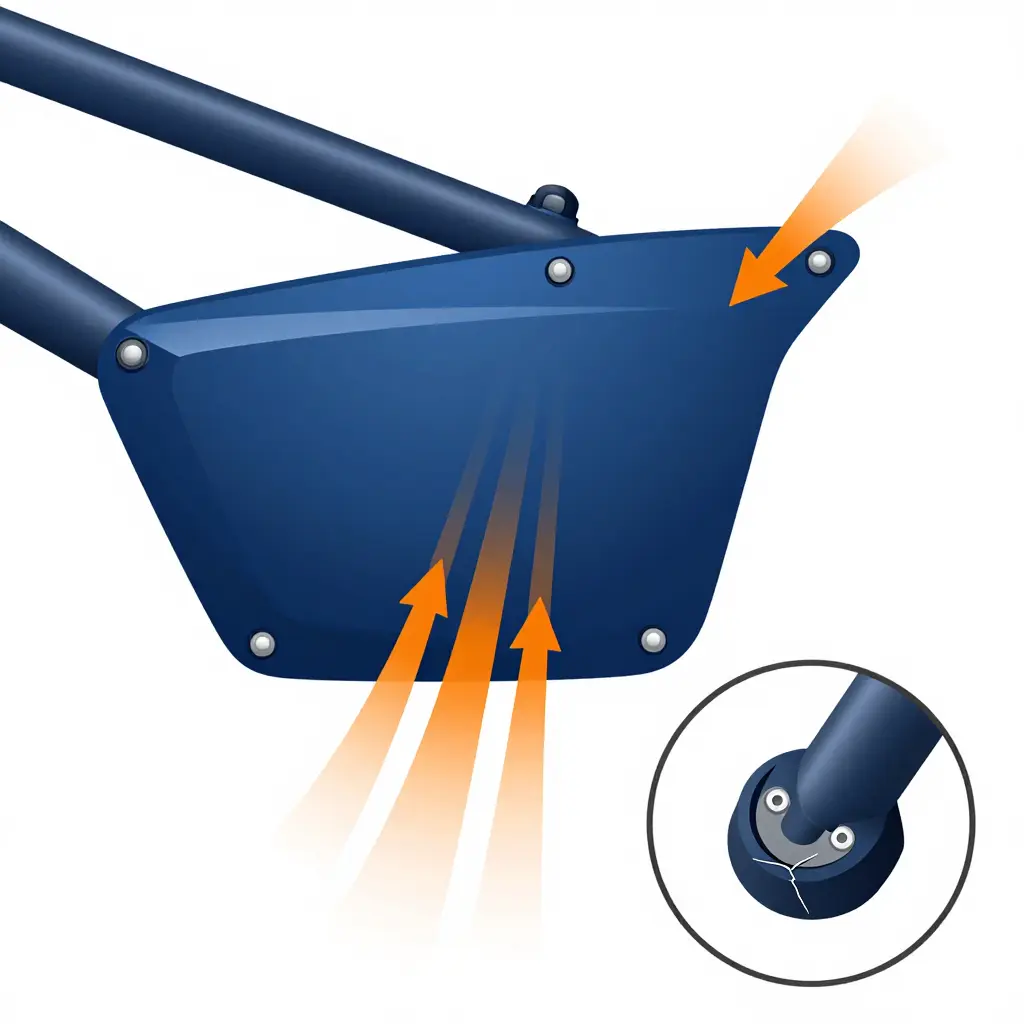
When the frequency of the incoming vibration matches a structure’s own natural frequency, the structure stops resisting and starts amplifying. This condition is called resonance. In practice, motorcycle fairing tabs reach resonance inside narrow engine RPM bands, where firing pulses, gear whine, and road input stack up at exactly the frequency the tab wants to move at. Inside that band, a tab can flex hundreds of times per second while the surrounding panel barely seems to stir.
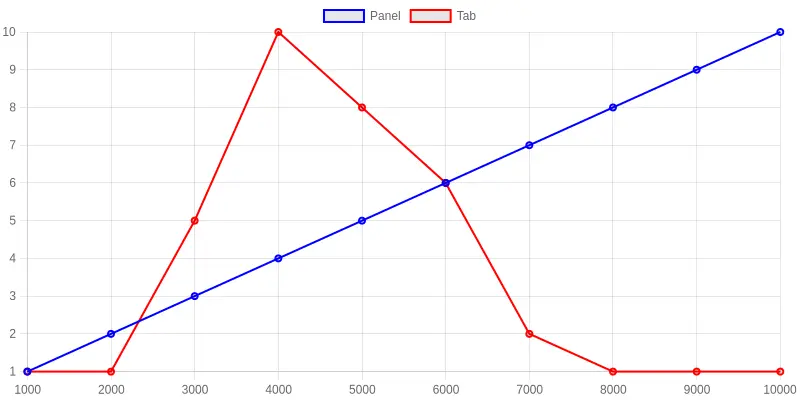
This is where high-cycle fatigue does its damage. Each tiny flex cycle stresses the plastic or metal at the tab’s base a little. No single cycle is strong enough to crack anything, but hundreds of thousands of low-amplitude cycles accumulate micro-damage until a hairline crack appears, long before the panel surface shows any scuff, warp, or visible wear.
The reason is geometry. A large, stiff panel spreads vibration energy across a broad area, so each square inch carries very little stress. A tab is a short cantilever: small, stiff, and heavily loaded. It absorbs the energy the panel distributes, and the stress concentrates at a sharp corner. Effective vibration damping – softer mounting, compliant isolators, or tuned materials – gives that energy somewhere else to go. Without it, tabs are the part that fails first.
OEM vs. Aftermarket Mounting Tabs: A Side-by-Side Reality Check
Before blaming a “weak panel,” put the two parts next to each other. Compare an OEM tab against a typical aftermarket fairing kit tab on damping, geometry, and stress paths – not raw panel thickness – because those are the factors that decide which piece cracks first.
| Feature | OEM Mounting Tabs | Aftermarket Fairing Kit Tabs |
|---|---|---|
| Material | ABS or glass-filled nylon tuned to the specific frame | Mixed, often unbranded ABS or thin polypropylene |
| Typical Thickness | 3-4 mm at the tab root, usually with molded gussets | 1.5-2.5 mm, frequently flat with no gusset |
| Mounting Hardware | Factory-matched bolts, clips, and rubber-grommet isolators | Generic bolts and coarse clips, isolators often missing |
| Vibration Damping Layer | Molded rubber grommets and compliant bushings at every contact point | Thin, mismatched, or absent rubber with rigid metal-to-plastic contact |
| Flexibility | A tuned balance of stiffness and give that tracks frame flex | Often overly rigid or paper-thin; rarely engineered or tested |
| Likelihood of Tab Cracking | Lower; damping spreads load and geometry follows the frame | Higher; missing damping concentrates stress right at the tab root |
The OEM advantage rarely comes from stronger plastic. It comes from a damping layer and mating geometry that let the tab move with the frame instead of fighting it. Thicker panels with no isolators transfer every vibration spike straight into a sharp corner, and sharp corners are where cracks start.
What the Engineering Data Actually Shows
Published engineering literature puts the dominant operating vibration band for most motorcycles between roughly 20 Hz and 200 Hz. Engine-order excitation at idle typically clusters near 20-40 Hz and rises toward 100-200 Hz at cruising speeds. Fairings and bodywork panels often show structural resonances in the same range, and when one of those coincides with engine or road excitation, the resonant vibration amplifies local stress at the hardware that ties panels to the frame. High-cycle fatigue is generally defined as loading above about 10^4 to 10^5 reversals. Steels used in brackets and tabs typically show a distinct endurance limit near 10^6 to 10^7 cycles; aluminum alloys have no true endurance limit, so their fatigue strength is quoted at a specified cycle count instead, often 5 x 10^8. Reported fairing-tab failures commonly start as stress-concentration cracks at bends, bolt holes, or weld toes, then grow over thousands to millions of small-amplitude cycles rather than from a single overload. SAE technical papers, materials handbooks such as ASM references, and manufacturer durability test standards all describe these as broad industry ranges rather than one fixed value, which helps explain why real-world failure timing varies so widely between models and riding conditions.
Where Failures Actually Start
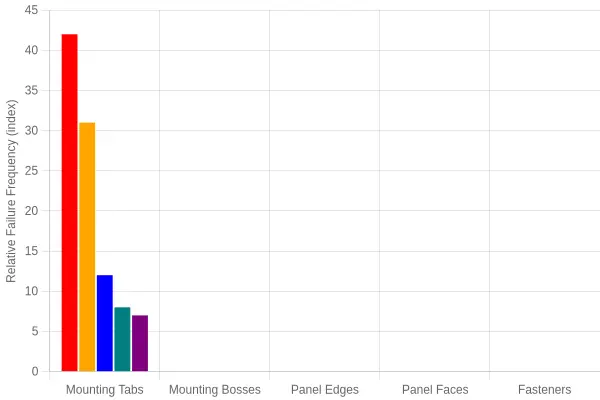
Mounting tabs and mounting bosses dominate failure initiation, and together they account for the vast majority of cracks before any panel surface is involved. That concentration at attachment points is why damping in aftermarket kits matters: the tabs and bosses transmit and amplify road- and engine-induced vibration, so they crack long before the more visible panel edges or faces do.
How Vibration Damping Stops Tab Cracking
Cracked fairing mounting tabs rarely fail because the metal is too weak. They fail because it is too rigid. A tab bolted metal-to-metal against the frame has nowhere to send the vibration energy coming up from the road, so that energy parks itself at the tightest point in the joint: the tab root. Vibration damping changes the physics of that joint by inserting a material that absorbs motion instead of reflecting it.
The Damping Materials
Each component attacks the same problem from a different angle, converting vibration energy into a small amount of heat through internal friction (what engineers call hysteresis):
- Butyl rubber washers – A soft, highly damped elastomer that sits between the bolt head and the tab. It deforms microscopically millions of times per ride, and every deformation bleeds a little energy away as heat rather than passing it into the metal.
- EPDM rubber washers – Weather-resistant and durable, EPDM handles UV and temperature swings while continuing to soak up the high-frequency buzz that would otherwise chatter the tab against its mount.
- Silicone grommets – Where the fastener passes through the tab, a silicone grommet isolates the bolt from the metal wall and blocks direct contact, so vibration cannot jump the gap in a sharp, damaging spike.
- Rubber-isolated mounting bushings – The heavy hitters. These decouple the tab from the frame structure itself, letting the whole fairing float slightly on a cushion instead of being rigidly welded to the chassis’s vibration.
Rigid metal-to-metal vs. damped fastening
| Factor | Rigid Metal-to-Metal | Damped / Isolated Fastening |
|---|---|---|
| Energy path | Vibration passes straight into the tab | Energy absorbed as heat by elastomer |
| Stress location | Concentrated at the tab root | Spread across the damping layer |
| Crack risk | High – repeated spikes fatigue the metal | Low – stress amplitude is reduced |
| Ride feel | Harsh, buzzing panels | Quieter, more settled fairing |
Why isolation reduces fatigue crack initiation
Fatigue cracks do not start from one big hit. They start from millions of small, repeated stress cycles that slowly wear the metal down until a tiny flaw opens. Damping and isolating the joint shrinks the amplitude of every one of those cycles. Keep the stress below the fatigue threshold and the crack never gets a foothold. That is why quality aftermarket fairing kits ship with elastomer isolation instead of bare bolts, and it is the same maintenance logic that protects the value of any work vehicle – see this guide on preserving the resale value of a well-maintained asset for the bigger financial picture. Bolted-in isolation is cheap insurance against an expensive repair.
When you tighten that fastener, you are really deciding how the tab will handle vibration for years. The diagram below shows where each damping layer sits in the stack.
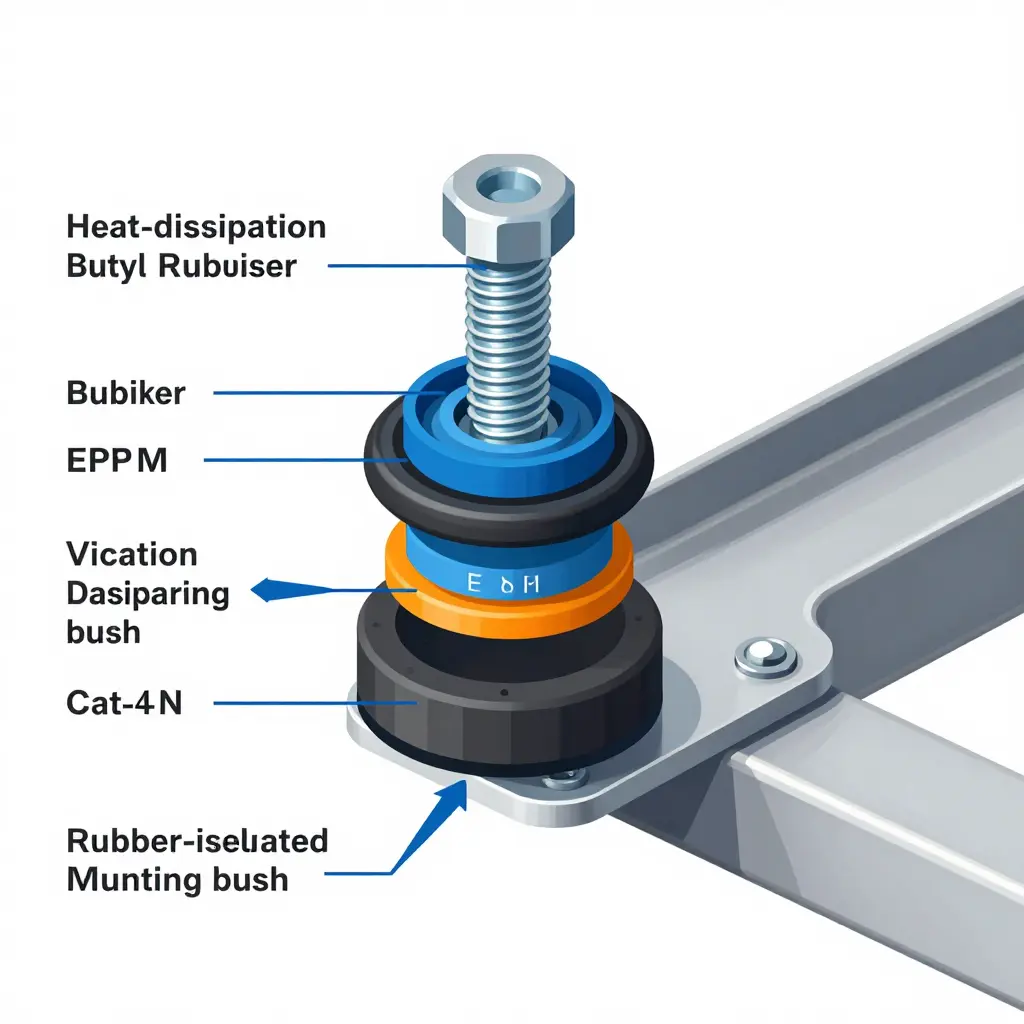
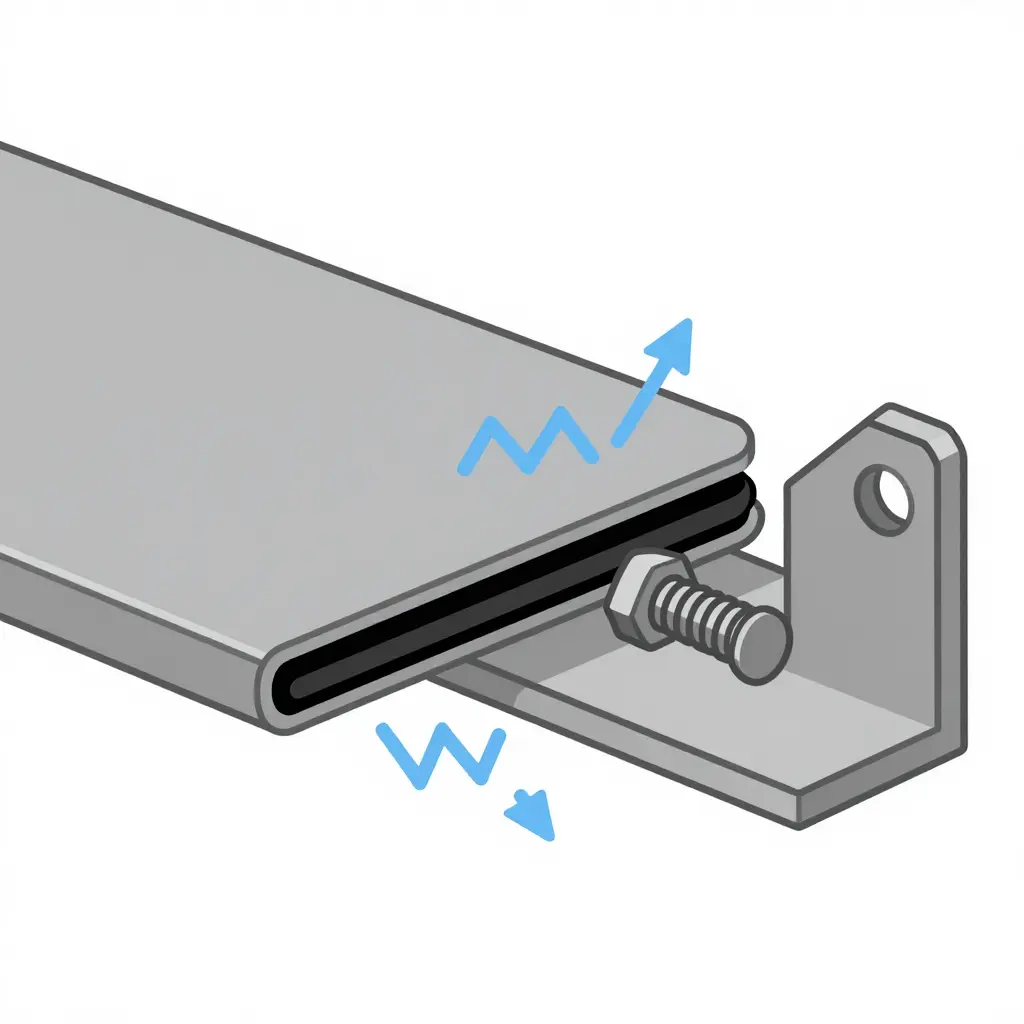
The cross-section shows the idea behind vibration isolation: frame on one side, tab on the other, rubber damping layer in between, fastener holding the stack together. Follow the arrows. Energy arrives from the frame side, the rubber absorbs it, and it never reaches the tab root. That is why a good washer or grommet keeps a mounting tab alive far longer than a rigid, metal-on-metal joint.
Installation and Torque Best Practices That Prevent Tab Cracking
Tabs usually fail long before the panels they hold do, and the reason is rarely the panel itself. It is almost always how the hardware was installed and tightened. A tab is a small, stiff lever that transfers every shake, road buzz, and engine tremor into the sheet metal at its root. Get the fastening wrong and you hand that fatigue a head start. A few habits, applied consistently, keep a fairing mounting tabs setup alive for years.
Tighten in the Right Order, in the Right Steps
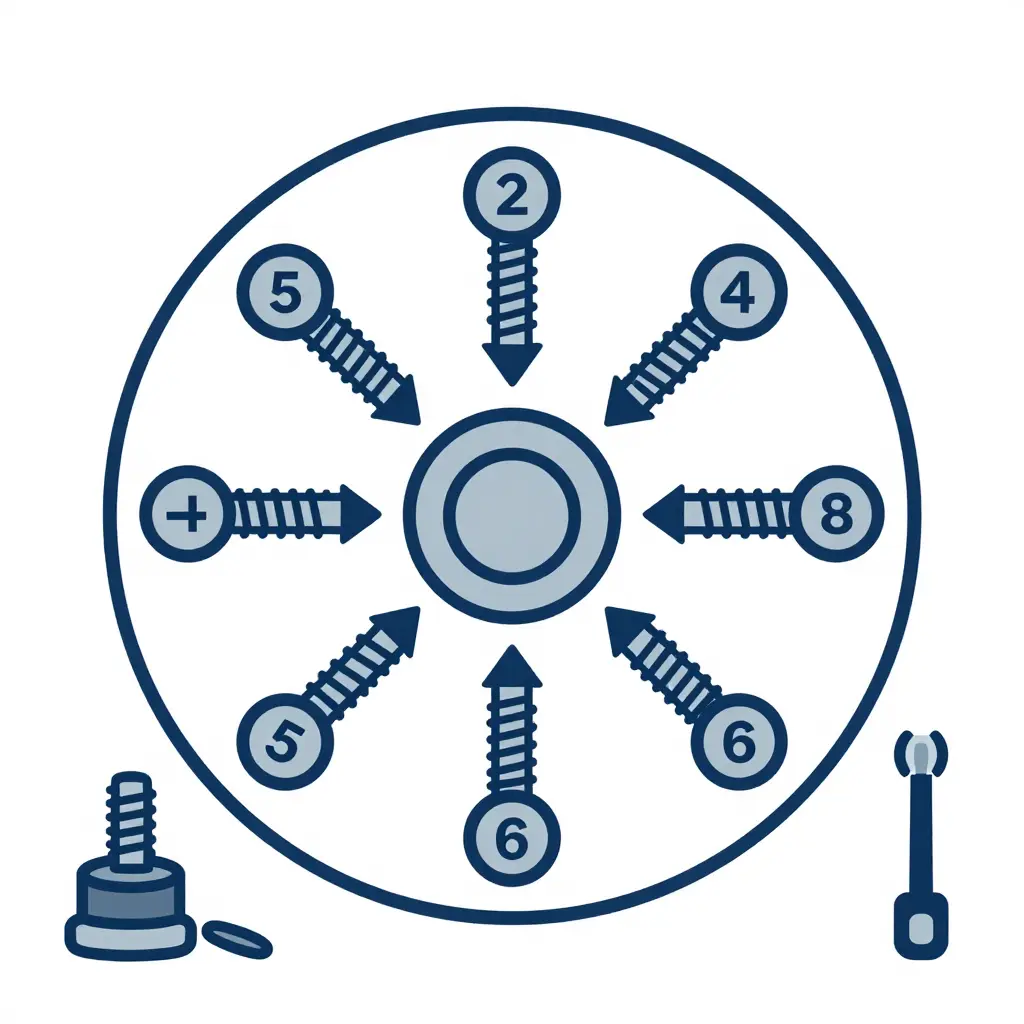
Follow the manufacturer’s pattern rather than working around the circle in a line. For a set of bolts on a flange, snug them by hand first, then use a star or crisscross sequence, moving diagonally opposite from one fastener to the next. Tighten in two or three graduated passes instead of one full-force pull. That spreads the load evenly, so no single bolt pulls the tab against the surface and bends it before the others even engage.
Use a Torque Wrench and Respect the Range
Guesswork is the enemy here. Work within the target torque range printed in the service spec, and use a calibrated torque wrench to hit the middle of that range, not the maximum. Recheck after a short settling period, since rubber isolators relax slightly once loaded.
Let Grommets and Shoulder Bolts Float
Grommets and shoulder bolts are not decorative. The shoulder stops the bolt from clamping the tab solid, and the grommet cushions the joint. Together they create controlled float that lets parts shift a few millimeters instead of forcing the tab to absorb every movement. Proper vibration damping happens in that gap, so never crush it flat by substituting a longer bolt or an extra washer stack.
Never Over-Compress Rubber Isolators
A rubber isolator squeezed too far stops isolating and starts transmitting. Once it is pancaked, it behaves like a rigid spacer, and every vibration travels straight into the tab root.
Don’t Mix Hardware Types
A high-grade bolt paired with a soft washer, or a shoulder of the wrong length, loads the joint unevenly. Keep the original hardware specification intact and replace like with like.
Why Over-Tightening Kills Tabs
Extra torque creates preload: a constant internal tension already sitting in the metal before the vehicle even moves. Fatigue damage accumulates with every stress cycle, and a joint that starts preloaded reaches its failure point far sooner. The crack typically begins exactly where the tension concentrates, at the tab root.
Treat these steps as prevention, not repair. A little patience with the torque wrench, paired with a realistic maintenance fund, goes a long way toward avoiding repeat failures. For owners thinking about how to set aside money for that upkeep, this guide on budgeting for preventive maintenance is helpful related reading.
Frequently Asked Questions About Fairing Mounting Tabs and Vibration Damping
Why do fairing mounting tabs crack before the panels do?
Fairing mounting tabs are thin, cantilevered mounting points that absorb concentrated vibration, so they flex far more than the broad panel surface around them. They are unsupported, and on many bikes they are molded from rigid ABS, so repeated vibration cycles fatigue the tab material long before the larger bodywork feels the strain. The panels spread force over a wider area, which is why they usually survive longer.
Do aftermarket fairing kits crack more than OEM parts?
Often, yes. Many aftermarket fairing kits use thinner plastic and looser tolerances than OEM components, so they do not sit flush and allow extra movement between the fairing and the frame. That play concentrates stress directly on the tabs, which is why cheaper kits fail faster unless the mounting points are reinforced or upgraded.
Do stiffer tabs actually help?
Rigidity helps only when the rest of the fairing is supported just as well. Making tabs stiffer without addressing fairing mounting tabs and vibration damping simply pushes the stress to the next weakest point. Balanced stiffness plus proper damping keeps the assembly stable and crack-free.
Which vibration damping materials work best?
Closed-cell rubber grommets, silicone washers, and butyl-based damping sheets are the most effective choices. They absorb high-frequency buzz instead of passing it straight into the plastic. A soft grommet at each mounting point plus a damping sheet on the inside of the fairing gives the best long-term results.
How often should mounting hardware be inspected?
Inspect fasteners and grommets every 3,000 to 5,000 miles, and always before a long trip. Check for loose bolts, hairline cracks, and hardened rubber that no longer dampens vibration. Staying ahead of this simple preventive maintenance schedule keeps small failures from turning into full fairing damage. If you have questions about sourcing replacement tabs, our team replies to sourcing inquiries within six hours.
Conclusion: Protect the Tabs, Not Just the Panels
The central lesson is simple: fairing mounting tabs crack before the surrounding shell because they concentrate stress at narrow contact points and absorb the undamped vibration that stiffer panels resist. In other words, the weak link in most motorcycle fairing setups is rarely the plastic bodywork itself. It is how the bodywork is mounted and cushioned.
The practical takeaways:
- Add vibration damping at every attachment point with rubber isolators, grommets, or flexible bushings.
- Torque fasteners to spec. Over-tightening preloads tabs and accelerates fatigue cracking.
- Inspect tabs regularly, and treat soft or hardened mounts as an early warning sign of panel failure.
Damping and correct installation protect a fairing more effectively than a thicker or stronger panel ever could. For riders and repair shops sourcing replacements, summitfairings.com stocks fairing kits across a wide range of models, which makes quality kits easier to budget.
Related reading: choosing the right food truck model