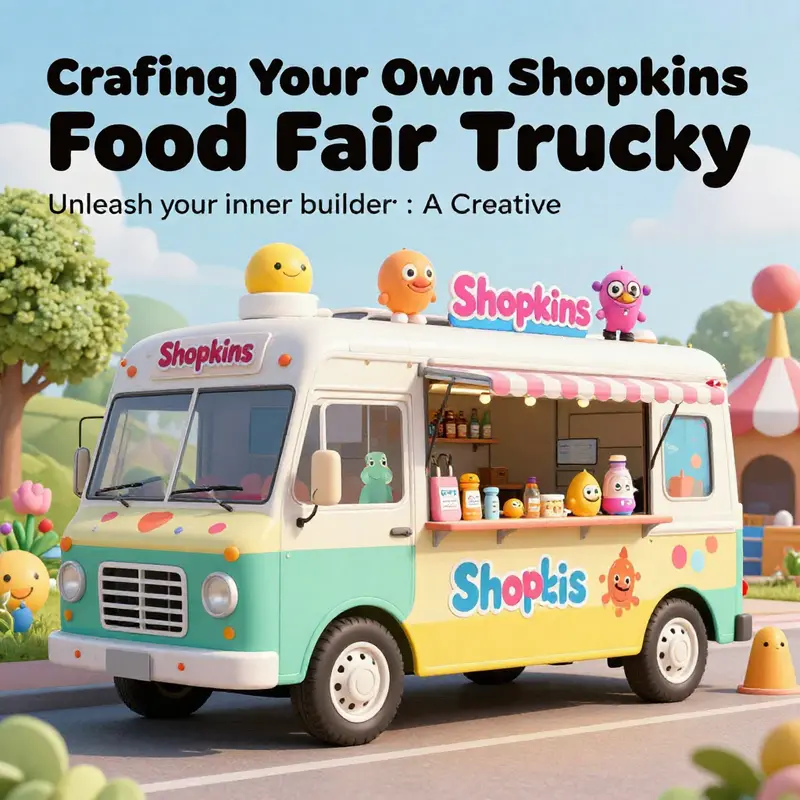
Building a Shopkins Food Fair Truck is not just a fun DIY project but a delightful way to bring your favorite characters to life. Whether you’re an event planner wanting to add a creative touch to your gatherings, a corporate HR team looking for unique team-building activities, or a food enthusiast keen on imaginative play, this guide offers you the perfect blueprint to merge fun with creativity. We’ll explore how to use the LEGO Friends Hot Dog Food Truck as our base model, potion in Shopkins characters into your design, and share exciting DIY tips to make your food truck truly one of a kind. Additionally, we’ll dive into other related LEGO sets for inspiration, ensuring your creation stands out at any food fair or event!
Building a Shopkins Food Fair Truck: Designing a Miniature Dream Vehicle from an Inspired Hot-Dog Truck Core
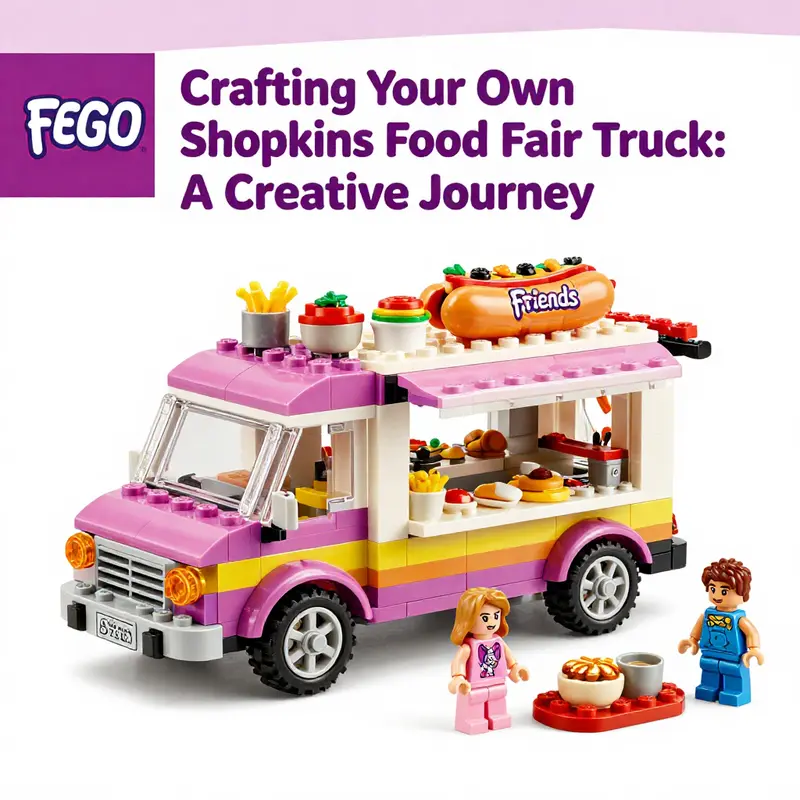
The challenge of building a Shopkins Food Fair Truck isn’t just about combining two beloved toy worlds. It’s about stitching together storytelling, scale, color, and playability into a single, cohesive scene that invites imagination to move as freely as the wheels on a busy street. When I approached this project, I treated the LEGO Friends hot dog truck as a practical starting point rather than a rigid blueprint. That starting point gives you a dependable chassis—a recognizable shape with a ready-made kitchen area, a serving counter, and friendly minifigures or character stand-ins. But the real heart of a Shopkins Food Fair Truck lies in translating the glossy, candy-bright world of Shopkins into functional play space, where tiny figures can stand, slide, stack, and showcase their wares while telling a story that’s as bright as the storefronts in a bustling market.
To begin, imagine the truck not as a single object, but as a small stage with three essential zones: the customer-facing counter, the culinary workspace, and the display shelves that turn the truck into a moving storefront. The counter is where Shopkins characters greet their customers, offer samples, and guide the story toward a closing scene of cheerful exchange. The kitchen zone houses the imaginative “recipes” of tiny treats, sauces, and toppings—each element a prop that can spark a new mini-narrative every time play resumes. The display alcove, tucked behind a glass panel or an open shelving system, becomes the heart of the truck’s personality. Here the Shopkins figures can arrange their products, line up their wares by color or flavor, and stage a quick, visual story about trends, tastings, or seasonal specials.
The process starts with a careful plan, not a guess. I map the footprint of the base truck and sketch the interior zones in a rough diagram. The goal is to retain enough of the original truck’s geometry to stay recognizable, while reconfiguring interior walls and shelving so that Shopkins figures can actually stand and interact. The base’s exterior curves matter as well. A shopfront needs clean lines and accessible entrances, but it also benefits from a few playful accents that signal a Shopkins vibe—soft pastel accents, bright signage that reads like a wink to fans, and tiny details that invite closer inspection. The truth is, a successful Shopkins truck feels handcrafted and charming, not clinical or perfectly symmetrical. Small asymmetries—like a wave in a wall panel or a curved edge on the serving window—add character and hint at the hands-on, DIY spirit behind the build.
Color is the second, equally important language. Shopkins characters celebrate bold contrasts and candy-sweet palettes. To fuse that language with a practical brick-based truck, I used a base palette that echoes the hot-dog truck’s friendly, accessible silhouette but layered in pinks, purples, ice-cream-tinged teals, and sunny yellows. The result is a truck that still reads as a food vehicle when viewed from a distance, but closer up reveals a playful spectrum that makes Shopkins figures pop. The kitchen area benefits from more neutral, workmanlike tones—cream, pale gray, and muted browns—to give the impression of counters, metal racks, and everyday kitchen tools. This two-tone approach keeps the build cohesive while ensuring the Shopkins characters and their goods become the visual stars.
A crucial part of the design is scale. Shopkins figures are tiny, and the truck needs to feel roomy enough for a few characters to move around without crowding. The trick is to give the interior a sense of proportion through negative space and modular components. I crafted the kitchen and display shelves as modular subassemblies that can be swapped or reoriented if the story shifts. When you pick up the truck and tilt it to inspect the interior, you should see a well-balanced arrangement: a counter that is tall enough for a figure to lean on, shelves that accommodate small display trays, and a back wall that houses a tiny, stylized refrigerated unit or condiment rack. The modular approach also allows for future storytelling twists—the shop can be rebranded for a seasonal fair, a new flavor launch, or a special event for Shopkins characters. The beauty of brick-building is exactly this adaptability: you build a strong core first, then you layer in narrative possibilities.
The tactile feel of the components matters as well. The Shopkins world is celebrated through texture as much as color—glossy surfaces for the displayed sweets, matte finishes for the counter, and a few metallic accents to suggest chrome on the kitchen equipment. In practice, this means mixing smooth bricks with textured plates, a sprinkling of curved slopes for a friendly exterior, and a handful of tiny tiles that act as decals or signage. Signage is a surprisingly potent storytelling tool. A storefront banner or a curved sign above the truck can advertise the day’s specials or simply celebrate the shop’s cheerful identity. Even the way the letters are represented—whether as printed stickers or painted-on blocks—conveys the mood of the shop. The aim is to create a readable narrative at a glance: the truck is open for business, everyone is welcome, and every display unit has a tiny story to tell.
Storage concerns come into play as well. In a world where small figures and tiny accessories abound, organizers and trays should be built into the truck’s architecture. A compact drawer unit behind the counter, a shallow tray on the kitchen wall for sauces, and a hidden panel for extra boxes of Shopkins goods can all be included. This isn’t just about keeping the set neat; it’s about enabling play that feels true to life. A customer arrives, tries a sample, points at a shelf, and the story pivots toward a quick decision to buy or to try another flavor. The internal organization helps this flow feel natural, rather than forced, turning a simple toy into a believable microcosm of a bustling market street.
In discussing the base model, it’s important to acknowledge the wider landscape of play sets that inspire this approach. While there isn’t a direct, official Shopkins Food Fair Truck set in the global market, many builders find value in looking at related, brick-based vehicles that emphasize kitchen workspaces and street-side service. The idea is to borrow what works—the ability to open up a kitchen, the presence of a serving counter, and a display wall—without becoming constrained by a single, exact blueprint. If you’re curious about how others translate compact professional kitchens into brick-built scenes, you can explore branding and design resources that discuss how to translate a truck into a mobile brand on wheels. These guides emphasize color theory, logo placement, and visual storytelling that can be adapted to a Shopkins aesthetic. A linked resource that has proven helpful for translating a toy world into a branded, cohesive presentation can be found here: branding-on-wheels-the-ultimate-guide-to-food-truck-graphics-and-identity. This reference encourages you to think about signage, color blocks, and the careful alignment of graphics with the vehicle’s silhouette, ensuring that the final piece feels both playful and polished.
As I assembled, I paid attention to the joy of scale, the rhythm of the display shelves, and the way Shopkins characters would inhabit the space. A tiny register, a dish rack turned into a colorful condiment station, and a row of mini display trays all contribute to a sense of bustling commerce. The characters themselves can be posed along the counter, some leaning on the prep station, others browsing the shelves. This dynamic makes the truck feel alive, not static, and invites children to create stories about customers arriving with napkins in hand, trade initiated, and friendships formed over shared treats. The narrative potential becomes the glue that ties the visual elements together. It’s not enough to replicate a truck’s exterior; the interior must invite action, dialogue, and pretend play across multiple sessions.
Crafting a display that feels authentic to Shopkins means leaning into small, iconic details. Tiny stickers or printed tiles can evoke seasonings, toppings, and cups. A few transparent pieces can simulate drink dispensers, while glossy tiles on the counter resemble polished surfaces. Accessories matter too. A miniature menu, a couple of tiny baskets, and a few color-coordinated “scoops” or containers can be placed on the shelves to suggest flavor variety and an evolving product line. The final touch is a sense of pride in the display’s arrangement. When the shop is stocked with pretty little prop wares, it signals that the truck is a serious contender in a champions’ marketplace, not merely a toy. The story depths deepen when the truck invites customer interactions: a Shopkins character explains a flavor, a kid-friendly “taste testing” moment unfolds, and a celebration of a successful day is staged with a small, celebratory banner or confetti pieces. This is where the magic crystallizes—the combination of a sturdy build with a responsive, imaginative play narrative.
Finally, there’s the question of how far this approach can scale. The base truck’s construction supports various extensions: a detachable trailer, a seasonal window display, or a modular stand for pop-up events at fairs or markets. Each extension remains compatible with the core design so you can swap in new features as the story evolves. The aim is not to create a single, fixed vehicle but to establish a modular platform that grows with the imagination. Because the Shopkins world thrives on color, character, and instant recognizability, keeping the truck visually bright and inviting is essential. But you should never lose sight of the core lesson: the most successful build is the one that makes the play feel effortless, as if the characters wandered into a candy-colored storefront and decided to stay for a while.
In closing, the practice of building a Shopkins Food Fair Truck around a brick-based truck design is less about fidelity to a single blueprint and more about translating a mood into form. The kitchen, the counter, and the display walls become a stage for stories that bloom with every pretend purchase. By preserving a strong core structure while weaving in Shopkins-inspired color, props, and storytelling devices, you create a vehicle that is both a display piece and a launchpad for endless play. You borrow the best of a known brick-building archetype, then layer on the whimsy, personality, and energy that define the Shopkins universe. This approach offers kids and collectors a tactile, interactive way to celebrate their favorite characters, a small, portable shop they can push along the floor or park on a shelf. And when a new tale arises—the arrival of a new flavor, a seasonal promotion, or a friends-and-family tasting—your modular truck can adapt, staying fresh and relevant without losing its core appeal. The result is a living, evolving miniature world that speaks to creativity, craftsmanship, and the shared joy of toy storytelling.
External resource: https://www.lego.com/en-us/product/hot-dog-food-truck-41386
Character-Driven Craft: Integrating Themed Figures into Your Food Fair Truck
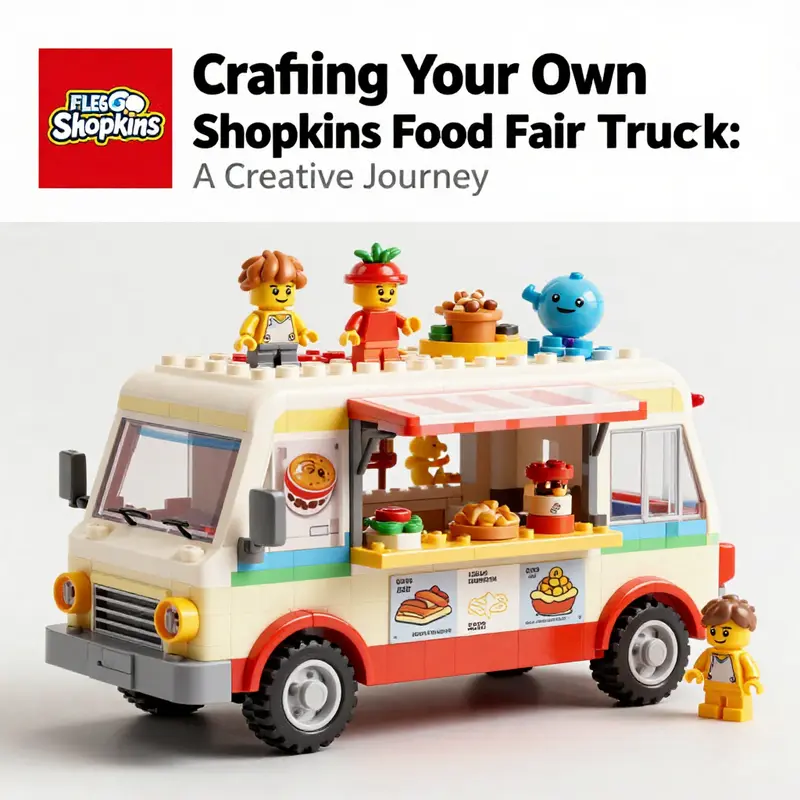
Designing a mobile food setting that feels welcoming and playful hinges on one simple idea: let the characters you build with your bricks take the lead. When you craft a food fair truck that features four dedicated figures—each representing a different station or role—you create a little narrative you can play out again and again. The core of this approach is not just the physical shape of the vehicle, but the way the characters interact with the space and with each other. In practice, you begin with a broad plan that foregrounds storytelling, then you fit the practical constraints of the build around that narrative. The result is a cohesive, modular design that reads as a single, self-contained world on wheels. To bring this to life, start by imagining the four stations as clearly defined zones within the truck: a taco counter, a hot‑dog station, a beverage and shake corner, and a frozen dessert display. Each zone has a distinct character that “works” there, and each character contributes to the overall rhythm of the scene. It is tempting to think in terms of exact names or brand references when you hear the word Shopkins, but the real magic comes from the idea that these are four distinct roles that can be performed by any small figure or accessory you choose. The key is how they stand at their stations, how they exchange items with customers, and how the display pieces convey the range of offerings without overwhelming the tiny interior.
The first step is to design for four active figures. Place the figures in or around the truck as if they are in the middle of a busy service shift. One figure might stand behind a compact counter, another could manage a rotary beverage station, a third would be near a glass case with pastries or frozen treats, and the fourth might be involved in restocking or managing a display of toppings. Think about posture and gesture: a figure leaning over a counter, a hand extended with a plate, another adjusting a sign, a fourth figure using a tiny umbrella to suggest a cold drink on a sunny day. These small poses matter because they communicate the everyday choreography of a food truck. You want the setup to invite a child—or a collector playing with the bricks—to imagine a scene in which customers approach, place an order, and leave with a smile. The simplest, most effective way to achieve this is to keep the lines of sight clear. Avoid clutter that blocks the service window or obscures the display. A clean, legible service area makes the story legible too, and that readability is what turns a static model into a living scene.
With the four stations defined, the next move is to consider modularity. A truck that can be reconfigured or expanded is more enduring than a single rigid build. Create the kitchen module as a compact, removable block that slides in from the back or lifts away from the main body. The service counter should be a separate, slim unit that can be swapped or rotated to change which station is closest to the customer window. The display area for beverages and frozen treats can be a small, transparent case on a hinge, allowing the top to lift for access during play. Modularity invites experimentation. It lets you swap stations to tell different mini-stories—perhaps a sunny day honeymooning the idea of icy shakes, or a rainy afternoon that shifts the action to a hot beverage corner. The key is to keep each module small enough to be handled easily, yet sturdy enough to survive repeated play. Use connector bricks and technique that ensure a snug fit but can be separated without violence. A well-balanced chassis that can be opened and closed with a gentle click makes the play experience durable and satisfying.
Color and texture are the silent storytellers here. The food truck should radiate vibrancy through color, but it should also feel cohesive. A pastel or bright color palette—soft pinks, mint greens, sunny yellows, and candy‑apricot oranges—can create a friendly Shopkins‑like atmosphere while remaining broadly appealing and kid‑friendly. Use color blocks to delineate zones: warm tones near the hot‑dog and taco counters, cooler hues for beverages and desserts, and a neutral base to keep the overall look grounded. Signage can be a playful, hand‑drawn style that reads Food Fair or a generic term like Treat Window. The signage should be clear yet whimsical, with space reserved for tiny decorative elements like tiny menu boards, chalkboard signs, or mini stickers representing toppings. The texture balance matters too. A mix of smooth panels and lightly textured bricks creates visual interest without appearing busy. The articulation at the service window should be straightforward—think of a sliding window or a hinged flap that can be opened for pretend transactions. When a customer approaches in play, the window becomes a focal point that invites interaction and dialogue, turning a simple build into a stage for storytelling.
Inside, the kitchen module can house the core micro‑cooking elements you imagine for the four stations. A tiny griddle or skillet can be suggested with flat, dark bricks and a few contrasting tiles to imply sizzling surfaces. A small grill rack can be simulated with thin bars or flat panels spaced to give the sense of a cooking line. For beverages, a compact cooler or beverage dispenser can be captured with a transparent element and a few blue or clear bricks that suggest refrigeration. A few round, flat tiles can simulate plates or cups stacked up for the day’s service. For the dessert corner, a contraption that resembles an ice‑cream maker or a soft‑serve dispenser can be represented with a simple nozzle piece or a tube shape attached to a small hub of bricks. The clever use of transparent bricks and flat tiles gives the illusion of glass jars and display cases without requiring specialized parts. The idea is to encourage imagination: kids can pretend to scoop, pour, pour, and serve as if they are mixing flavors, layering toppings, or balancing a tray of orders. It’s the play flow as much as the physical form that carries the experience.
The geometry of the truck itself should support the story. A compact, approachable silhouette that hints at a bustling kitchen inside works best. Consider a rounded cab for the driver’s space and a boxy rear section to read as the kitchen. The dividing line between the two can be a slim, decorative stripe or hinge line that’s visually clear but not jarringly separate. If you want a sense of mobility and scale, mount the truck on small wheels and ensure the base has a little lift, so it can “park” in a pretend lot or a street scene in front of a kids’ display. You may even add tiny decals that resemble wheels’ motion lines, a subtle cue that this is a vehicle in constant movement, always ready for the next order. These narrative cues—motion, service, and joy—are essential to making the model come alive beyond its bricks.
When it comes to figures, the choice of poses and accessories matters as much as the construction. If you have the option to customize with small, movable figures, place them to suggest different tasks: one figure taking orders at the window, another plating items at the counter, a third attending the beverage station, and a fourth arranging the display. Accessories can be as simple as micro‑detailing pieces: a tiny tray, a few round “topping” pieces to sprinkle over imaginary desserts, a couple of spoon utensils, and a couple of small “menus” you can prop up near the window. The rhythm of the play is created by how these pieces coordinate—how the plate arrives to a customer, how a beverage is slid across the counter, how a dessert is lifted from the display. The beauty of the setup is that it rewards improvisation. A single, well‑sculpted scene can be rebuilt in a dozen different ways with a relatively small number of extra bricks and a handful of careful role assignments.
To keep the project feeling fresh and extensible, consider leaving space for future additions. You might plan an expanded menu, a second truck, or a rotating seasonal display. The modular mindset makes this possible without tearing down the whole model. A future addition could be a second food station that attaches to the side or back of the truck, expanding the service footprint while preserving the storytelling core. You might also introduce a tiny customer bench or a queue area to emphasize interaction. With a little foresight, the same truck becomes a launching pad for a small, interconnected world, where new characters, new dishes, and new stories can be introduced with minimal rework.
For readers who want to anchor their project in a broader community or gather inspiration from others who enjoy themed builds, a look at community resources can be invaluable. One helpful avenue is a general community hub where builders share ideas, photos, and tips. You can find ongoing discussions, walkthroughs, and creative tweaks that reinforce the idea that this is a collaborative, evolving project rather than a one‑off model. The joy of a community-driven build is that it helps you see possibilities you might not have imagined on your own. It also sparks conversations about play value, durability, and display, which in turn informs how to approach future revisions of your truck.
The path from concept to brickwork is as much about narrative pacing as it is about the bricks themselves. Start with a rough sketch of the truck’s exterior, then map out the four stations on a simple grid. Translate that grid into a modular interior that can be opened and closed, leaving room for each figure to perform their task. As you assemble, pause to consider the play value: Can a child easily move a figure from the counter to the display? Is the serving window large enough for multiple pretend orders at once? Do the colors align to suggest a cohesive, inviting space? Answering these questions early helps you avoid a final build that looks good but fails to support imaginative play. Remember, the ultimate goal is not to imitate a real-world kitchen exactly but to translate the warmth and whimsy of a food fair into a portable, tactile story that can be experienced with a handful of bricks.
If you want to deepen the sense that the truck belongs to a larger universe, link the design to a broader set of ideas about food: the seasonal shifts in signs, the changing lineup of desserts, and the way customers interact with the truck across a day. The narrative arc can move from morning opening to noon rush to early‑evening wind‑down, with each phase offering unique visuals and interactions. The four figures then become anchors for these beats, their actions marking time and progress in the story. Such a readable, evolving world invites repeated engagement and makes the toy truck much more than a static display. It becomes a tiny stage where a child can re‑tell stories, adjust the cast, and experiment with new arrangements, all while keeping the core design intact.
If you want to explore further real‑world ideas for how to structure, decorate, and stage a moveable food service concept, consider following community discussions that curate practical builds and design tips. For ongoing ideas and discussions about the broader world of mobile food storytelling, you can visit the community blog that collects inspiration and tips for enthusiasts of all ages. This resource is a good way to stay grounded in practical, durable construction while you let your imagination roam. Loschi Ladro Truck Blog.
External inspiration can also come from practical build guides and real‑world considerations that translate surprisingly well into miniatures. In the broader world of themed builds, you’ll find helpful discussions about how to balance function and aesthetics, how to stage a compact kitchen so it remains accessible, and how to design a service area that feels welcoming from both sides of the counter. These insights—about durability, modularity, and storytelling—translate neatly to a Shopkins‑style or Shopkins‑inspired food truck, even when you choose not to name specific products. A good external reference can illuminate the path from a playful idea to a durable, interactive display that holds up to repeated play sessions, photos, and future revisions. For readers who want an external resource to explore, a practical example that aligns with the core ideas described here is available via a general product and build guide hosted by a major retailer. It offers a perspective on how small‑scale display and modular design can coexist with a lively, character‑driven narrative.
Ultimately, the magic of a character‑driven food fair truck lies in its capacity to blend craft with storytelling. The truck becomes a canvas where four figures act out a day’s work in a micro‑cosm of the Shopkins world, a tiny stage where customers, toppings, and treats converge in a celebration of color, texture, and interaction. Each move you plan—where to place a display, how to pose a figure, or how to open a hatch—reaffirms the idea that play is a constructive act. You’re not simply stacking bricks; you’re building a space that invites imagination, a portable vignette that can be re‑imagined again and again. And as you continue to refine the layout, you’ll likely discover that the best design surprises come from the smallest details—the angle of a sign, the way a tray sits on a counter, or how a figure’s stance suggests readiness to serve. Those micro‑choices accumulate into a bigger, brighter picture: a food truck that looks and feels alive, a compact world built from bricks, and a story waiting to unfold with every interaction.
Driven by Imagination: Crafting a Custom Shopkins Food Fair Truck with DIY Techniques
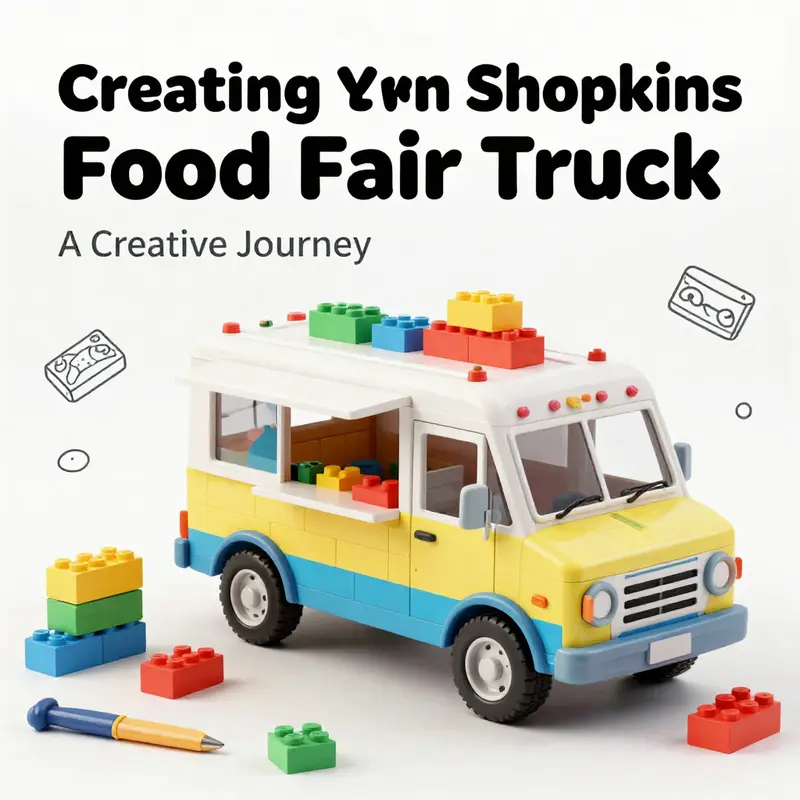
A Shopkins world thrives on the charm of tiny stories, bright colors, and the joyful bustle of a street market where friends gather around a gleaming, pocket-sized food truck. Building a Custom Shopkins Food Fair Truck through DIY techniques is less about following a rigid manual and more about translating play value into a portable theater for miniature characters. The aim is to craft a vehicle that looks lively, invites interaction, and stands up to the frequent handling of eager hands and curious eyes. This project leans on the same core principles that drive successful DIY builds: modular design for adaptability, durable materials that endure countless “servings,” and thoughtful detailing that sparks storytelling. In the broader arc of making a Shopkins-themed world, the truck becomes a mobile stage where characters float through menus, peak behind windows, and swap mini meals with friends. Rather than copying a single template, the work becomes a personal design language—a compact business on wheels where the storytelling happens in color, texture, and tiny, tactile moments.
The journey begins with a quiet choice about materials. A sturdy base is essential because you want to support tiny figurines and the weight of decorative elements without warping or collapsing after a few playful sessions. Thick cardboard or foam board provides a reliable backbone, offering both rigidity and lightness. This is not a rigid, museum-grade build; it’s a toy-leaning sculpture meant to be handled, rearranged, and reimagined as the Shopkins cast grows. The chassis should be large enough to accommodate a miniature kitchen surface on one side and a display area on the other, while still fitting neatly on a shelf or inside a toy den. The rest of the truck follows the same logic: a modular structure that can be disassembled for transport or reconfigured for a new seasonal menu, mirroring how real street vendors rotate offerings as crowds shift and weather changes the street’s pace.
Decoration, color, and texture carry the energy of a food fair. Shopkins thrives on bright, candy-like hues, high-contrast accents, and playful fonts. To achieve this without overwhelming the design, use colored cardstock, acrylic paints, or markers to establish a consistent palette. Keep the palette lively but cohesive—pastel blues, pinks, sunny yellows, and mint greens work well together when distributed with a deliberate rhythm across the truck’s panels. Textures matter, too. A glossy finish on the main body paired with a matte counter area can mimic the contrast of enamel kitchen surfaces and weathered storefront wood. If you want the look to celebrate the storytelling aspect, consider adding tiny decals or hand-drawn menu items near the serving hatch. The menus can be written on small chalkboards or notepaper cut to size, giving the truck an active, changing display that invites players to imagine new offerings, prices, and seasonal specials.
The heart of the build lies in the mobile interaction it enables. A Shopkins world is a world of motion and encounter, so the vehicle should invite action. The design includes a front, side panels, and a roof that can be opened or removed for access to the pretend kitchen. A small window that slides open or an adjustable display stand on the side makes it possible for figures to “serve” customers without forcing the pieces to detach entirely. This is the kind of dynamic element that keeps play fluid and engaging over longer sessions. The more you embed these kinetic details, the more the truck feels like a real, operating unit within the Shopkins universe. Consider how a street vendor would switch items from a refrigerated display to a warm-serving counter; translating that sense of transition into your build—perhaps with a rotating display rack or a hinged serving hatch—will deepen the narrative possibilities for children and collectors alike.
Wheels are where the craft and the whimsy align most clearly. For a toy-sized vehicle, corrugated cardboard can be cut, folded, and shaped into simple yet sturdy wheel forms. Attach them with brads or paper fasteners so they can rotate, while reinforcing joints with tape or a dab of glue to resist wobble. The look of the wheels benefits from a touch of scale realism: a small tire lip, a subtle hub, or even painted rings around the wheel edges help the truck feel grounded in a tiny world that mirrors real street vehicles. You’re balancing two goals: wheels that turn to enable “driving” play and a wheel assembly that remains robust despite repeated openings, closings, and shelf-docking. A playful detail is to craft the wheel wells with curved cuts that echo the shape of a compact food truck—this small curvature makes the silhouette read clearly as a vehicle from across the room, a crucial cue when little shoppers scan a display of micro-chow.
Lighting adds a layer of theater to the finished piece. Optional LED accents near the serving window or along the signage can illuminate the interior and draw attention to the kitchen zone, especially in dim play spaces or during evening scenes within a pretend market. Battery-operated LED kits are straightforward to install; they require careful routing of wires and discreet battery housing so the tech does not distract from the play. Even if lights remain unlit, visual triggers—glossy signage, light-catching paint, and shiny tabletops—can simulate the glow of a sunlit stall and lend the same sense of warmth that shopfronts cast on real-world streets. The goal is to create a vehicle that feels inviting in any light, so the signboard and counter area deserve special attention. A quick trick is to apply metallic or pearlescent paint to small trim pieces to catch the light as a child moves the truck about in a playroom panorama.
A Shopkins vehicle must accommodate a little cast of cooks, cashiers, and customers. The mini food items—a handful of clay pies, pretend pastries, and tiny burgers—become the star of the show when arranged on the serving counter or tucked into a rotating display. Sculpting these items from clay or heavy paper gives you control over scale and color. The more texture you add to the food models, the more tactile the experience becomes. For example, a tiny clay bun can have a soft, doughy top with a subtle sesame texture, while a clay bun’s sides can be smooth and rounded to reflect a glossy, shop-ready finish. The display area should feel abundant but organized, like a tiny market stall where customers can point and claim their favorites. A simple chalkboard menu across the counter can be updated as the story evolves, reinforcing the sense that the truck is a living, changing business rather than a static prop.
To anchor the project in a broader play context, weave in a branding thread. A vehicle’s identity matters as much as its shape. The truck should carry a cohesive visual language—color blocks, a legible logo treatment, and consistent font choices—that announce its Shopkins personality to the block shelf and the play space. A practical way to approach branding is to plan a small identity system before painting. Sketch the logo on scrap paper, select two or three typefaces (or hand-drawn letter styles) that read clearly from a distance, and apply them to the serving hatch, menu boards, and any signage. The result is a truck that looks ready for a festival circuit and invites repeated storytelling sessions. A branding-focused approach to the vehicle’s identity helps it feel authentic, and you can explore this further in the community resource that concentrates on vehicle graphics and identity on wheels. branding on wheels guide to food truck graphics and identity.
The modularity of the build is a deliberate design choice with practical play value in mind. By constructing the truck as a set of interlocking panels, you can swap or reconfigure sections to create different configurations for different stories. A removable roof panel makes it easy to access the interior during play, while snap-fit side panels allow you to reassemble the vehicle into a slightly larger or smaller form without needing tools. This flexibility mirrors how real-world food vendors adapt their setups to different markets or events. If you want to push the concept further, you can design extra add-ons—such as a pop-up canopy or a tiny storefront awning—that attach to the truck’s sides with magnets or simple hooks. The more you embrace modularity, the more you empower children to remix the scene, test new ideas, and extend the play life of the truck without starting from scratch.
The completion of the build is a moment of reflection as much as celebration. You set the vehicle on a base that complements its scale, perhaps a cardboard street mat or a small printed cityscape that acts as a stage for the Shopkins world. The base should be stable but not heavy, allowing the truck to be moved around a table, a shelf, or a play space without tipping. It’s the small, careful decisions—the thickness of the countertop texture, the way the window glass catches light, the exact color balance—that turn a good project into a cherished plaything. When the truck sits in its display space, a sense of story emerges: a menu of daily specials, a bakery pannier tucked in the corner, a mock tip jar, and friendly Shopkins figurines gathered around the counter, pretending to choose their afternoon treats. The scene invites dialogue about flavors, costs, and the social rituals of shared meals, which is precisely what makes a DIY project resonate long after the glue dries.
In the broader arc of making a Shopkins world, this truck is more than a prop. It’s an invitation to iteration, a small-scale lab for experimenting with color, proportion, and interaction. The project encourages you to think in systems: how the kitchen zone will function visually, how the display relates to the order window, how the signage communicates during a quick glance across a room. The same mindset applies to other builds in the Shopkins ecosystem, where each new vehicle or stall expands the storytelling possibilities without breaking the imaginative continuity. If you intend to publish or share your build with friends or a student audience, emphasize the process as much as the product. Document the color choices, the structural decisions, and the moments when a wheel or a hinge revealed a better solution. The story of how you navigated those little design challenges will be a compelling part of the project’s narrative.
Finally, the educational value of such a build should not be underestimated. This is an opportunity to introduce simple engineering ideas in a friendly, accessible way: understanding how load distribution affects a vehicle’s stability, how modular joints enable reconfiguration, and how lighting and color choices influence perceived mood. Children can learn to plan, test, and revise, gaining confidence in their ability to transform a vision into a tangible object. They also learn care and responsibility for their creations, treating the truck with respect and imagining future adventures in which new Shopkins characters appear and new recipes are invented. The metaphor extends beyond play—the same skills were used by designers and makers in the real world when evaluating materials, constructing durable prototypes, and communicating ideas through visuals and storytelling. This is the spirit of the project: a small,busy vehicle that carries big ideas and a big heart for imaginative play.
External reference: For techniques on building modular, durable play structures inspired by professional construction approaches, you can explore a detailed home-building guide that emphasizes modularity and durability in a hands-on project. https://www.instructables.com/How-to-Build-a-Custom-Lightning-McQueen-Racing-Track/
Bricks, Bites, and Brimming Stages: How Brick-Build Inspiration Shapes Your Shopkins Food Fair Truck
A Shopkins Food Fair Truck represents more than a toy on wheels. It is a stage where color, texture, and imagination fuse to tell a micro-story of service, snack time, and community. To build this dream, many crafters start by looking outward, toward sets that emphasize food-themed play, interactive kitchens, and characters who move through a small world with big personalities. The idea is not to copy a single model but to borrow design language from widely loved brick-build play—kitchens that feel functional, trucks that feel sturdy, and display areas that feel inviting. From these, you extract patterns that fit the Shopkins universe. The result is a truck that is not only visually vibrant but also rich in play possibilities. You want the truck to invite a child to imagine a busy market day, where shopkeepers greet customers, tiny flavors are discussed, and a parade of bright characters takes a turn at the serving counter. The challenge, and the reward, lies in translating that energy into a build that is approachable yet capable of hosting a steady stream of stories.
Begin with the chassis, the foundation on which every playful scenario rests. A sound base is essential for a vehicle that might be moved, opened, and rearranged during a game. The core principle is modularity. Instead of one monolithic shape, think in distinct zones that snap together and can be reconfigured. A front counter acts as the first point of contact with customers, a kitchen block maintains the flow of food preparation, and a back area stores cups, trays, and snack items. Keeping these zones modular is not a constraint; it is an invitation to remix. A sturdy connection between modules allows for reliable play, so the truck endures the rough adventures of eager hands while remaining easy to take apart for new setups.
The kitchen portion should feel credible within the tiny scale. Even in a diminutive space, the illusion of a real kitchen is important. A compact stove or grill, a sink area for cleanup, and a small fridge or cooler give a sense of function without crowding the interior. The trick is to design with clear visual cues: a row of little burners, a tiled backsplash that reads as “work surface,” and a counter-height that is comfortable for Shopkins-sized figures to work at. The design language here borrows from the real world of food trucks, where efficiency and accessibility go hand in hand. A well-organized kitchen not only looks authentic but invites the player to stage micro-routines: flipping a pretend pancake, whisking a sauce, or ladling a familiar-looking drizzle into a serving cup.
The service counter is where the interactivity truly sparkles. A good counter includes a few interactive touches that invite roleplay. A small till or cash area, a menu board, and a display of tiny sample treats encourage children to negotiate with customers and to invent orders. The display case can be built with transparent bricks to showcase pretend pastries and treats—bright, glossy, and tempting. To keep the table dynamic, consider a rotating condiment station or a flip-top lid that reveals a hidden treat beneath. These features add a tactile layer to the storytelling, turning a simple purchase into a moment of discovery.
Color is the fastest way to signal a Shopkins world to the eye. The palette in this build should feel candy-bright and cheerful, with pinks, purples, turquoise, and sunny yellows playing off clean whites and warm wood tones. Such a scheme helps the vehicle read as a delicious, friendly place, a destination kids want to visit again and again. Signage is essential here too. Bold, simple letters, maybe a single descriptive word or two, help establish the truck’s identity without overloading the scene. If you are using printed stickers or custom decals, keep the motifs playful and in the same tonal family as the bricks themselves. A cohesive color story makes every accessory feel integrated rather than added on as an afterthought.
Beyond the exterior, the interior deserves careful attention. A compact worktable, a small oven or grill unit, and a sink with a tiny faucet become the quiet heroes that support play. Storage is another crucial element: shelves or bins that tuck under the counter keep the kitchen area neat and accessible. Store the pretend ingredients in labeled boxes or colorful jars. These little organizational choices reinforce the idea that the truck is a real operating space where customers come for speed and smiles alike. When the shop begins to feel lived-in, children are more likely to lean into role-play, creating stories about busy lunch rushes, special-offer days, or surprise deliveries.
If you want to deepen the narrative depth, think about character placement and interaction. In the Shopkins world—whether you’re using official figures or compatible mini-characters—the idea of a team working together is central. A cheerful crew member might handle the grill, another may greet customers at the counter, and a third could manage drinks or toppings. The dynamic becomes a playground for social storytelling: the crew could practice customer service, discuss which flavors pair best with certain treats, or celebrate a small win when a line of customers dwindles. The trick is to keep the cast small but expressive; a few well-placed faces and attitudes are enough to power countless stories without cluttering the scene.
The flow of play is another design consideration worth embracing. The truck should feel easy to navigate, with obvious entry points for Shopkins characters and intuitive paths between zones. A wide front opening simplifies scene changes, while a doorway at the back can reveal extra storage or a prep area. Keep in mind how a child will hold and manipulate the build. Round, soft edges and not-too-tight fits help little hands operate the vehicle and its components with confidence. This is where the choice of joints and hinges matters: you want doors that open smoothly, panels that swing with a satisfying click, and enough friction to keep pieces in place during vibrant play without pinching joints or causing frustration.
The inspiration you draw from other brick-building play sets can be translated into practical techniques. For instance, a kitchen setup in a popular line often demonstrates how to incorporate a working beverage station, a pretend sauce rack, and a piping bag or squeeze bottle system. A street-food stall frequently features an appealing display and signage that can be adapted to a Shopkins theme. A mythic or culturally inspired food truck can contribute a narrative layer, offering a sense of story that goes beyond the mere act of serving. Even without naming specific sets, you can study their functional modules—the way surfaces are organized, the cadence of opening and closing mechanisms, and the way accessories cluster near the serving area—and apply those ideas with your own color choices and branding.
Part of the joy in building this truck is making it a collaborative canvas. If you are building with a child, invite them to choose the color scheme, then discuss why certain colors feel welcoming. If you are using a mix of bricks from different sets, you can talk about compatibility, such as how a hinge connects two panels, or how a transparent brick can turn into a display window that catches the light and makes tiny treats seem even more delicious. The process becomes a conversation about design, function, and storytelling rather than a rigid set of steps. In this sense, the build mirrors the flow of a real food truck’s day: the morning rush, the steady mid-day pace, and the little moments that make a visit memorable.
To keep the project approachable, it helps to establish a simple method for planning. Start with a sketch or a mental map of the key zones: counter, kitchen, display, and storage. Then, choose a base color and a few accent colors that will unify the whole truck. Build the front of the truck first as a strong visual anchor, then add the interior modules. Finally, create a removable canopy or awning that can be easily detached for play or transport. This plan is intentionally flexible, allowing changes as the child’s imagination evolves. The truck can be extended into a small market stall, or adapted into a larger vehicle for a festival scene. The number of possibilities grows as the imagination expands, and the modular approach makes those expansions simple and joyful.
Incorporating Shopkins characters into the truck world provides a natural bridge to storytelling. The characters’ personalities can guide the build: a bold, bold-faced character might require a larger display and a flamboyant sign, while a shy character could prefer a compact prep area and gentle lighting. Accessories—mini cups, tiny pastries, glossy sauces, and decorative cake toppers—are the currency of story in this space. These details, though small, create micro-stories that children love to enact: a customer selection, a quick preparation, a playful exchange, and a cheerful goodbye as the customer leaves with a bag of treats. The joy of the Shopkins world lies in its little dramas—tiny triumphs, friendly disagreements over flavors, and warm exchanges between staff and customers. A well-built truck becomes the stage on which these scenes unfold, the engine that drives imagination forward.
If you want to broaden the horizon beyond the core build, consider visiting a resource that discusses choosing compatible models for play trucks. It offers ideas on balancing scale, playability, and collection cohesion while suggesting how to size options for different playsets. For additional ideas on selecting a compatible model, see Choosing the right food truck models. That guidance can help you decide how ambitious to be with your Shopkins truck, how many modules to include, and where to place the emphasis—on speed, on display, or on a rich, narrative kitchen that invites role-play.
The practical payoff of these inspirations is a truck that feels alive. It has a rhythm you can hear—the hiss of the grill, the clink of cups, the soft thud of a door closing after a customer leaves. The aesthetic harmony—the bright colors, clean lines, and balanced proportions—keeps the build legible for little eyes and encouraging for big hands alike. The end result is not simply a toy but a small universe where characters come to life through play. The truck’s interior becomes a theatre for micro-dramas; its exterior, a billboard of whimsy and welcome. This is the essence of translating brick-build inspiration into a Shopkins-focused project: a vehicle that invites daily storytelling and endless variation.
In the planning and execution, remember to keep safety and accessibility at the center. Avoid overly fragile connections that could break during enthusiastic play. Choose joints and plates that have a little room to breathe, so pieces don’t snap under pressure and kids can reconfigure at will. Keep small elements within reach yet secure enough to prevent loss. The most satisfying builds are those that withstand countless reimagining sessions, not those that crumble after a single game. A truck designed with sturdy foundations, reinforced zones, and clear, simple interactions will reward you with longer play and more stories to tell. And because the Shopkins universe thrives on color and charm, don’t shy away from bold combinations, even if they seem playful or a touch indulgent. In a world of tiny characters and big flavors, boldness is the thread that stitches imagination to action.
As you close the build, you’ll notice how the act of planning, assembling, and testing the truck has its own narrative arc. The drafting table becomes a map of ideas, the table itself a stage for the first “customer rush,” and the final product a tangible celebration of play and possibility. The relationship between form and function is most visible here: a well-proportioned kitchen area makes every pretend recipe feel authentic, while a bright, welcoming counter invites hands to engage in the play. The truck stands not as a finished artifact but as a living project—one that can grow with the child’s playstyle, a seedbed for new stories every time it’s opened, closed, or rolled across the floor.
For those who enjoy linking their builds into a broader play ecosystem, the Shopkins truck can be paired with other compatible sets to form a playground of small businesses and market stalls. The little world you create can host a parade of different vendors with complementary themes, enabling cross-narratives and longer-running adventures. This approach keeps the joy alive long after the initial assembly, inviting repeat play without redundancy. It also reinforces the idea that design is a conversation between the builder, the play environment, and the stories that emerge from those interactions. The truck becomes not just a product of a weekend project but a living component of a child’s imaginative landscape.
To conclude, the pathway from inspiration to assembly rests on the balance of practical building and imaginative storytelling. In the end, the Shopkins Food Fair Truck becomes a bright, bustling vehicle where tiny characters have big moments. The design choices—from modular zoning and sturdy construction to color theory and interactive features—are the threads that weave a durable, delightful play experience. The truck should feel ready to roll into a festival of stories, a portable stage where name-brand whimsy meets the timeless joy of constructing, rearranging, and narrating. Through careful planning, thoughtful detailing, and an openness to adapt, you transform the spark of an idea into a fully realized world on wheels. External reference: https://www.lego.com/en-gb/product/hot-dog-food-truck-41765
Final thoughts
Creating a Shopkins Food Fair Truck can be an enriching experience bursting with creativity and joy. By starting with the LEGO Friends Hot Dog Food Truck as your foundation and infusing it with personalized Shopkins characters, your DIY project is well on its way to becoming a charming attraction at any event. Don’t forget to explore other LEGO sets for extra motivation and innovative ideas to enhance your design. Whether for play, decoration, or an event theme, this food truck can serve as a canvas for endless imaginative adventures!