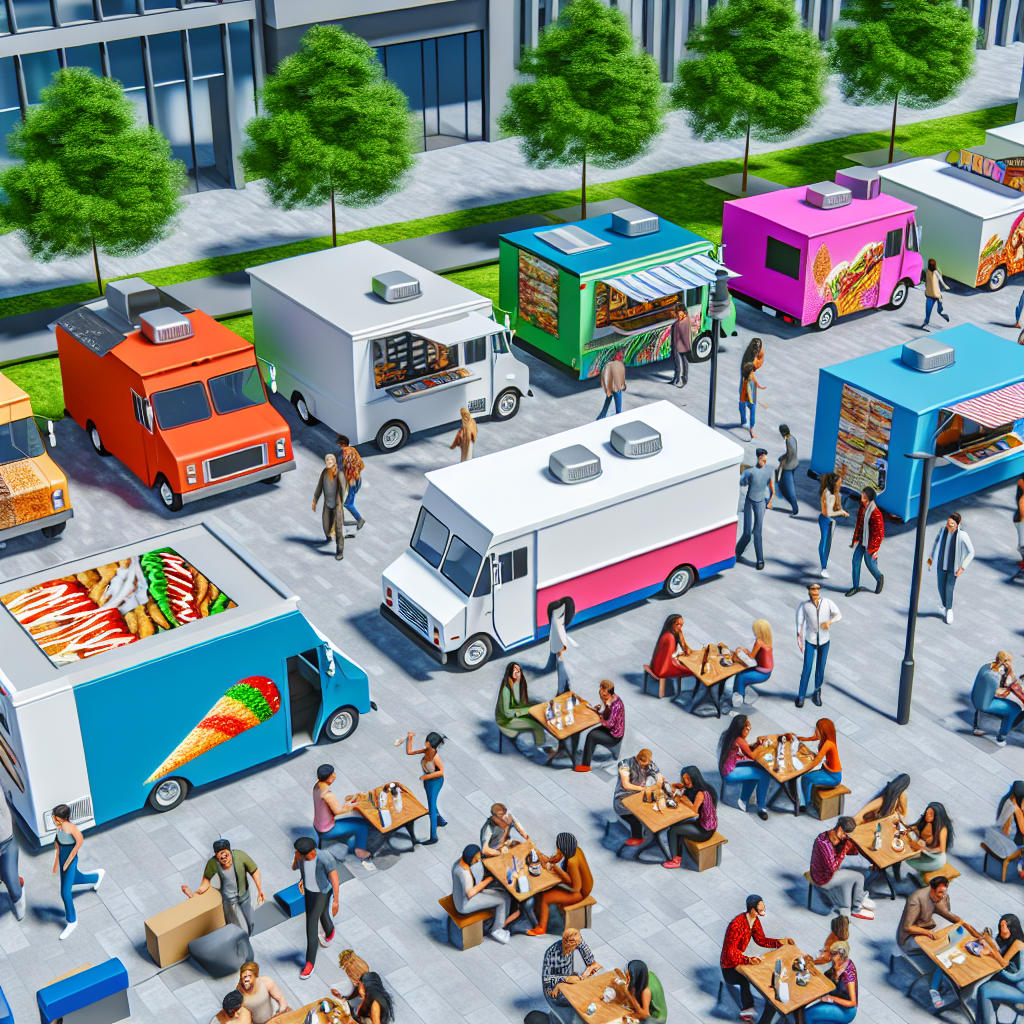
Imagine the buzz of a bustling street fair, a pop-up tasting, or a staff appreciation day, all powered by a bright, DIY cardboard food truck. This guide is crafted for event planners and organizers who want memorable visuals without breaking the budget; corporate HR and admin teams seeking a hands-on team-building activity; local community groups looking for a collaborative project; and individuals who love a crafty challenge. Cardboard is lightweight, recyclable, and endlessly adaptable—a canvas for creativity that travels well to classrooms, festivals, and promotional displays. By detailing four connected chapters, this article shows you how to turn simple cardboard into a sturdy, visually striking truck, layer on personality with color and signage, and leverage the project for learning, safety, and practical applications. The journey starts with material choices and foundational design, moves through assembly and structural integrity, explores aesthetics and finishing touches, and ends with the educational value and real-world uses. Each chapter builds on the last, ensuring your cardboard truck isn’t just decorative but a functional, shareable symbol of collaboration, innovation, and community spirit. Let’s roll through the process with energy, clarity, and a dash of playful culture that makes every build feel like a celebration.
null
null
From Flat Cardboard to a Standout Display: Mastering Assembly, Joints, and Structural Integrity in a Cardboard Food Truck
The cardboard food truck project begins where many crafts end: with a careful plan that respects both aesthetics and physics. A display that looks playful on the surface can collapse under a light touch if the builder has neglected the forces at work in a three-dimensional object. The challenge is not just to cut a cheerful silhouette; it is to create a frame that will hold its shape, resist bending, and invite viewers to imagine the hustle of a busy street corner. The journey from a flat sheet to a standing, display-ready truck hinges on three intertwined decisions: selecting the right material, drafting accurate templates, and employing joining and bracing techniques that translate design intent into tactile solidity. When these elements align, a simple cardboard box becomes a persuasive stand-in for a real vehicle, capable of serving as a classroom prop, a promotional prop, or a spark for creative play.
Material choice matters more than it might first appear. Corrugated cardboard, the same sturdy material found in shipping boxes, offers a natural edge over thin cardstock. The outer liner remains relatively rigid, and the fluted interior provides a modest resistance to bending when the panel is thin but well supported. To push durability further, many builders laminate two or three layers of cardboard to create thicker walls for the main body and base. The extra mass is not just about heft; it reduces flexibility, which in turn minimizes flexing when the structure is handled or displayed under lights. The exterior can be reinforced with tape or edge strips, but the real backbone comes from the joints and the interior bracing that tie the walls into a stable frame.
With materials in mind, the next step is to translate concept into concrete parts. Start with a detailed template drawn from a scale model. A typical food truck design comprises a main body that includes both a cab and a trailer, a front windshield, side windows and doors, a roof, and a serving counter. Draft the template on a cereal-box-sized sheet first, then scale up to your intended dimensions. Trace the pieces onto your cardboard, taking care to align edges so that the panels can meet cleanly. Before you cut, double-check measurements against your template and label each piece. Precision here saves hours of adjustment later and reduces the temptation to force mismatched parts together, which is a common source of weak seams.
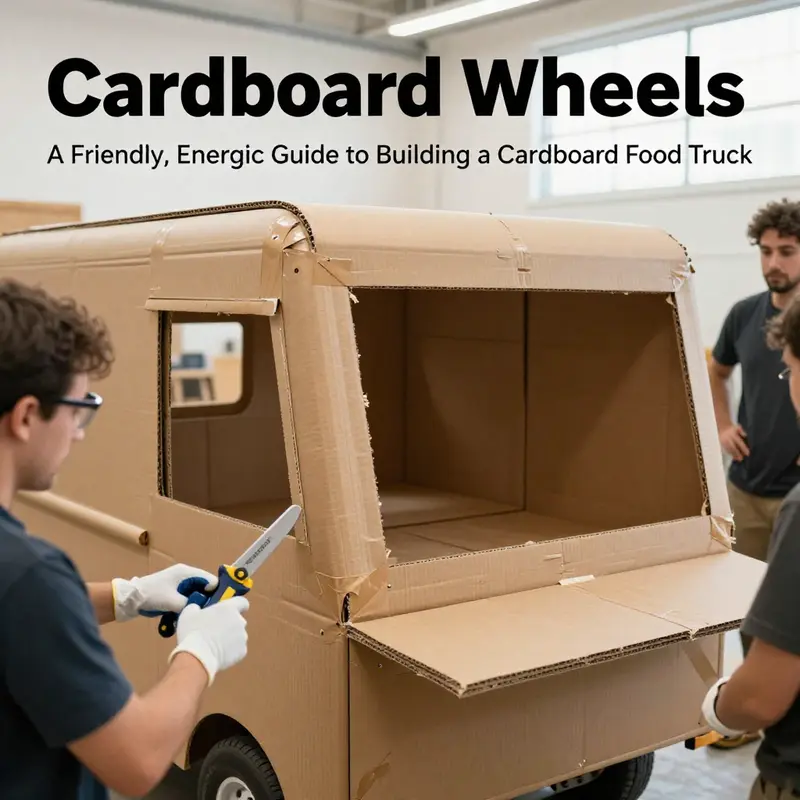
The actual cutting calls for discipline. A sharp blade, a straightedge, and a slow, deliberate motion help yield edges that sit flush when joined. Rustle-free edges aren’t just a cosmetic concern; they minimize gaps that can trap moisture or invite flexing under pressure. As you cut, consider how each panel will be joined in the final assembly. The better your edges align, the easier it is to seal and reinforce the joints. After cutting, it’s time for a gentle test: do the walls align into a box shape without forcing the pieces? If a panel won’t sit flat, trim carefully rather than yank the edge into place. The aim is a clean, square frame that forms a stable skeleton for the truck.
When it comes to assembly, strength comes from combining adhesives with mechanical fasteners and smart geometry. Glue is important, but it should never be the sole source of strength. White PVA glue works well for cardboard, and hot glue can be used for rapid, immediate holds. For long-term stability, consider liquid wood glue or a similar wood adhesive that dries hard and resists curling. Lamination—gluing two or three layers of cardboard together—transforms thin walls into rigid panels that can resist the pressure of handling and the demands of a display setting. Once the glue cures, reinforce the exposed seams with tape on both sides of the joint. The double-sided reinforcement prevents flex and keeps the corner lines crisp.
The heart of the structure lies in the joints. Weak joints are the number-one culprit behind collapses in cardboard builds. A few robust techniques can dramatically elevate performance without adding much weight:
- Box joints: Interlocking tabs along the edges provide a snug, square connection. They distribute stress evenly across the seam and resist pulling apart if the truck is moved or bumped.
- Mitered corners: Cutting corners at 45-degree angles allows faces to meet in a continuous plane. When glued properly, miters present a neat finish and offer resilient edges that don’t lift under small loads.
- Reinforced L-braces: Small cardboard brackets glued into each corner add a predictable anchor, especially where walls meet the base or where the roof seats on the walls. These braces act like tiny telescoping supports that keep the frame from racking.
- Internal bracing: Diagonal struts or cross-pieces perched inside the frame create triangles, the most stable shape for a load-bearing structure. Cardboard handles compression well, but it buckles easily under tension; a well-placed interior brace transfers force away from flat panels and toward the corners where the joints live.
These methods are not mutually exclusive. A well-made cardboard truck often combines several approaches: box joints at critical corners, miters on long edges, and a web of internal braces to stiffen the entire frame. Internal braces are particularly useful along the roof line, where a shallow sag can ruin the truck’s silhouette and invite panel separation under display lights or minor wind effects if used outdoors.
Stability extends beyond joints to the overall geometry of the frame. The base should be broad and low enough to prevent tipping, especially if a display will be touched or nudged by curious hands. If height is a design feature, counterbalance with a wider footprint or a lightweight ballast inside the base. A heavier base keeps the truck grounded, while a light, intentionally designed top minimizes the risk of top-heavy tipping. The roof deserves attention as well. A sloped or gently pitched roof, if supported by interior beams, resists sagging much more effectively than a flat deck. Internal beams should be secured to the walls with both glue and tape so the roof remains a rigid, undistorted shell rather than a pliable surface prone to creases.
Attachment strategies matter as much as the shapes themselves. A roof that sits on top of the walls without clear contact lines is a recipe for instability. Glue a stiff edge into a small groove cut along the top perimeter of the wall panels, then stitch the seam with tape to cap the joint. A short interior strip can help the roof bear weight and maintain alignment under repeated interaction. It’s helpful to pre-plan the locations of doors, windows, and the serving counter so internal bracing can avoid interfering with these elements while still delivering structural support where it’s needed most.
Decorative elements are the final flourish, but they can influence stability if not managed with care. A flamboyant awning, heavy signage, or oversized display panels can pull on the walls and displace weight. If you want dramatic visuals, design those features as removable or lightly attached components that do not engage the primary frame directly. Lightweight textures—such as faux brick panels or metallic striping—add realism without creating stress points. For wheels, simple cardboard cylinders or caps fashioned from rolled strips of cardboard can simulate motion without adding heavy housings that stress the base. If you want wheels that feel tangible, mount them on short skewers that pass through a small drilled hole and are stabilized by a dab of glue. This approach gives the truck a playful, almost kinetic feel without compromising the frame’s integrity.
Even a robust frame needs a finished surface that resists minor wear and tear. A light coat of water-based sealant or acrylic spray can slow moisture uptake and help the color stay vivid. When painting, choose water-based paints or markers rather than solvent-based products, which can warp cardboard or emit strong smells. A careful finish helps the display endure a day of handling in a classroom, at a fair, or in a storefront window. Texture plays well with color; crumpled paper patches or rolled-paper tubes can replicate metal rivets or panel seams, which adds depth without adding weight.
The practice of building a cardboard truck invites iteration. It’s common to test fit a few panels, then revise the template to correct misalignments. If a panel bows, add an internal brace where the bow appears and re-seal the seam. If a joint seems loose, reinforce with extra tape and a dab of glue along the joint line. The process rewards calm, deliberate work rather than fast, forced assembly. For younger builders, this is a chance to learn the value of planning, measurement, and testing in a hands-on way. It’s essential to keep safety in mind: always supervise, use age-appropriate tools, and maintain a clean, organized workspace so that blades and adhesives remain away from small hands when not in use.
Beyond the practical craft, the cardboard truck offers a lens into sustainable design. Cardboard is renewable and recyclable, and layering a few sheets responsibly can create a durable, reusable display without the costs and waste associated with more rigid, commercial models. The trade-off comes in the form of weight and fragility; thicker walls demand careful handling, and the more complex the joints, the more planning the build requires. The payoff, however, is a portable, playful vehicle that can travel between classrooms, fairs, and windows with a tactile, charming presence. A well-constructed cardboard truck demonstrates how simple materials, when shaped with intention, can emulate real-world engineering and still carry a sense of whimsy and discovery.
If you’re seeking a concrete reference that reinforces these assembly principles, a step-by-step video tutorial offers vivid guidance. It demonstrates reinforced joints and layered construction, translating theory into practice in a way that complements the written guidance. The video helps you visualize how a box joint feels when aligned correctly and how a mitre creates a clean, professional exterior line. It also shows how a lightweight internal brace can make a dramatic difference in resistance to bending and wobble during display use.
For those exploring the broader questions of branding and visual coherence, you can consult additional resources on the blog that focuses on graphics and identity on wheels. See more at the internal resource: branding-on-wheels-the-ultimate-guide-to-food-truck-graphics-and-identity. This reference helps align the truck’s appearance with its structural integrity, ensuring that a sturdy build is paired with a visuals that communicate purpose and personality.
In sum, the core of turning a flat sheet into a standing cardboard food truck rests on disciplined material choices, precise templating, and a thoughtfully layered approach to joints and bracing. Lamination strengthens the walls, box joints and miters deliver durable connections, and internal bracing curbs the tendency of large panels to bow. The base remains the quiet protective anchor, the roof earns its rigidity through internal supports, and the decorative layers add life without compromising stability. The result is a display that can endure touch, attract attention, and spark curiosity—an accessible example that thoughtful craft and simple engineering can transform ordinary cardboard into something that feels durable, purposeful, and playful. And when that truck finally takes its place in a classroom, fair, or storefront window, it does so with a quiet authority born of sturdy joints, layered construction, and a well-considered balance between form and function.
As you plan your next cardboard vehicle, remember that the smartest adjustments come from testing and iteration. Start with a clear template, build a rough frame, and then press, twist, and press again to identify any flex points. When you find them, reinforce with the joint techniques described here, add internal supports where needed, and recheck the balance of weight and load. The result will be a cardboard truck that not only looks the part but also behaves like a small demonstration of practical engineering. If you want a visual companion to this guidance, explore the linked resource for a practical demonstration of reinforced joints and layered construction. And for broader ideas on branding and presentation, the internal link provides a concise, visually oriented companion to the craft. The journey from flat cardboard to a standing, display-ready vehicle is rewarding precisely because it invites you to test, adapt, and imagine—one deliberate cut at a time.
Cardboard on Wheels: Finishing Touches for Realism
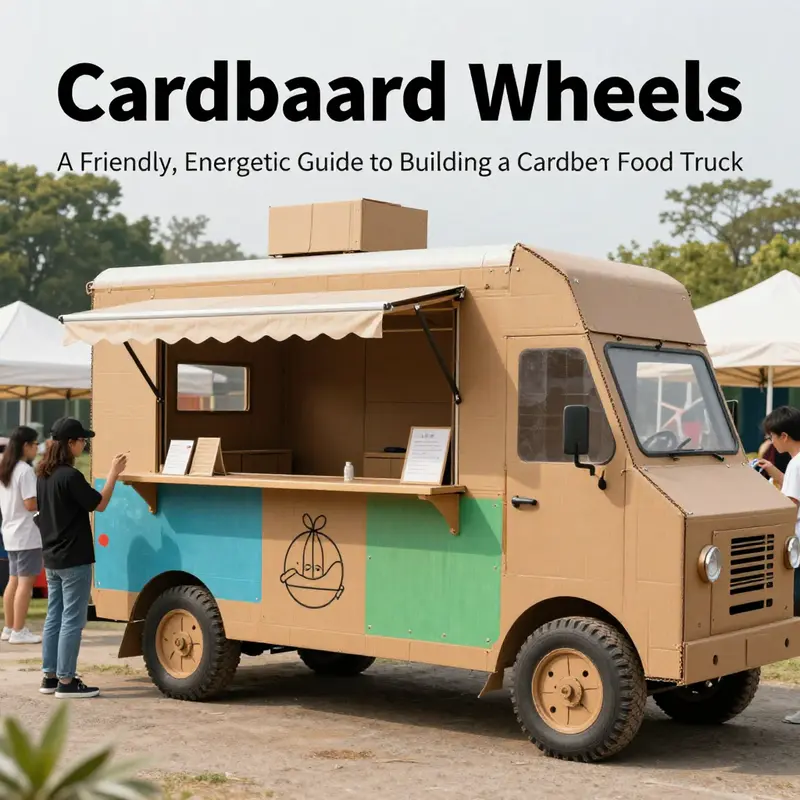
The final stage of a cardboard food truck is the finish, where details turn a simple box into a street character. The aesthetic work—textures, color, signage, and light—transforms the display into something believable that invites observers to lean in, inspect the counter, read the menu, and imagine the bustle of a real truck. Cardboard’s flexibility lets you layer, weather, and refine until the truck feels fully real, even at display scale. This chapter guides the eye along surfaces, around corners, and toward the calling card of any food business: identity expressed in color, typography, and signposts.
Begin with a clear theme. Will the truck echo a retro diner vibe, a sleek modern street-food aesthetic, or a vibrant dessert cart persona? The answer shapes color, panel texture, and signage. The palette should be disciplined: two or three core colors with a high-contrast accent. If the theme is retro taco wagon, lean into bold oranges and blues with chrome edges. If a vegan street-food stall is the goal, consider earthy greens and warm neutrals with crisp white panels. Test color swatches on scrap cardboard first and observe how light plays on matte versus glossy finishes and how colors read from arm’s length and across a room.
Textures matter as much as color. Real food trucks wear their surfaces differently: metal panels show scuffs; wood appears grainy; plastic windows glaze softly. The cardboard you build can mimic these textures with a few careful techniques. Dry brushing creates a worn, reflective edge that suggests metal panels catching the light. Sanding between coats softens edges for a milled look. If you want a rustic touch, use a fine charcoal pencil to draw weathering lines along seams and wheel wells. For wood textures, a thin stain or marker drawn with the grain direction can replicate planks without bulk. The goal is depth without heaviness; every texture should imply use and exposure to sun, rain, and handling.
Signage is the soul of a display truck. Start with a bold front banner or a large side panel readable from across a room. Create a simple logo that scales well and remains legible at small sizes. Raised letters cut from thicker cardboard or foam board add a tactile dimension. Use thick poster boards for the base and attach individual letters with strong glue or double-sided tape to imitate a real storefront sign. Consider a two-tier sign system: a prominent top sign for the brand name and a lower panel for a short tagline or the type of offerings. If your theme includes icons—taco, burger, cone, or stylized flame—design them as clean, scalable shapes that can be reproduced in multiple colors. Attach these near the service window or on the truck sides to create focal points that guide the viewer’s eyes.
Typography requires careful balance. Choose bold, highly legible type for the main name and a simpler font for secondary text like a menu or slogan. Avoid overly decorative fonts that lose legibility at a distance. When painting letters, masking tape helps create sharp edges and straight lines. Apply thin coats rather than one thick coat to prevent bleeding and lifting at edges. If you plan to digitize the look later, compatible fonts that reproduce well in print and on signs will help maintain consistency across all materials, from mock menus to any hand-drawn elements.
Menu boards deserve a special portion of attention. They are not merely text; they are invitations to imagination. Create a side menu board with a clean layout and generous white space. Use a grid or column structure to arrange items; keep each line short and easy to scan. Color-code sections to echo the truck’s palette and reinforce the theme. For depth, mount a narrow frame around the menu board using a contrasting color to mimic a real serving station. If you have space inside the truck, a tiny interior menu board can reinforce realism when viewed from the front or side. The font size should be legible from a few feet away, and the color palette should offer strong contrast against the board’s background to ensure readability.
Lighting, though optional, can dramatically elevate realism. Battery-powered LEDs tucked behind a translucent panel glow softly and add warmth. Diffuse the light with tissue or tracing paper to avoid hotspots. A gentle halo around a backlit sign makes the branding pop without glare. If LEDs feel excessive, consider a single warm-toned LED behind the service window to suggest activity inside. Even a simple string of tiny lights along the roof edge can imply operation in low-light environments. If the display is meant for outdoor use, ensure wiring and power sources are shielded from moisture and designed for safe handling inside a display setting.
The service window itself is a stage for interaction. A crisp counter painted in a color that contrasts with the truck body invites guests to imagine placing an order. Attach a narrow strip of faux counter space along the window line to create a visible ledge where a pretend cash register or condiment bottles could live. Small props—miniature jars, faux condiments, a folded menu—help tell a story of what the truck serves and how it operates. The interior is an opportunity to push detail without increasing bulk. A tiny grill silhouette, a paper placemat, or a printed mock recipe can be tucked into the interior to imply function while keeping the exterior clean and uncluttered. You don’t need to build a full kitchen; suggestivity is more convincing than completeness.
Depth and layering add a convincing three-dimensional effect. Build panels in layers, then offset some elements slightly from the main body to create casts and shadows. For example, an exterior awning can protrude a bit above the window, or a window frame can sit a touch forward of the wall to imply depth. Weathering can be applied more aggressively to lower panels and wheel wells, simulating wear from street use and contact with the ground. A light dusting with a sponge soaked in a slightly darker hue can mimic dirt and grime that accumulate in corners and along the base of the truck. If you want a metallic sheen, use metallic paints sparingly on raised edges rather than across entire surfaces to avoid a flat, toy-like finish.
Every piece of signage and every texture choice should align with the overarching theme. If you’re pursuing a retro diner look, incorporate checkerboard accents, chrome trim simulated with silver paint, and a menu board that resembles a classic diner chalkboard. For a modern street-food vibe, keep the lines clean, use bold primary colors, and feature a minimalist logo that still communicates the style of the cuisine. If dessert is the focus, incorporate pastel tones, playful icons, and a curved, friendly font. The unity of color, texture, lighting, and typography creates a believable world. When a viewer walks past the display, the eye should move from the brand name to the logo, then to the service window and finally to the menu board, slowing down at each step to absorb the details.
A thoughtful approach to texture and finish also improves durability. Sealing exposed cardboard edges with a thin layer of clear acrylic or a light coat of glue helps prevent friable fibers from lifting with handling or moisture exposure. Masking tape along edges protects paint lines and cushions sharp corners that might snag fingers during a display setup. If safety is a concern—particularly for school or classroom displays—opt for non-toxic paints and adhesives, and avoid small detachable parts that could become hazards in high-traffic environments. The goal is not only beauty but also resilience under routine handling and transportation.
Incorporating an external link to professional guidance can enrich your approach. For example, a resource focused on branding and identity provides practical strategies for graphic consistency across a display; it can guide your decisions about color, typography, and symbol design. This is not a pull from a manual but a way to anchor your choices in a coherent identity that remains legible and attractive as light shifts across the room.
The finishing process is where planning and technique converge. After you apply base colors and lay the first layers of texture, step back and evaluate from multiple angles. A viewer’s first impression often comes from the silhouette and the overall color balance. If the shape reads clearly but the color feels flat, a second color pass with a thin glaze can restore depth. If the silhouette feels heavy, lighten the upper panels with a brighter hue to push the eye upward. If the branding looks small from the far side, enlarge the key logo proportionally, ensuring it remains clear at distance. The simplest truth of good display work is that changes are easier to make before assembly is fully locked in. It’s much harder to repair a sign that has been glued in place and painted over.
The finishing touches extend beyond art and signage. Props and surrounding scenery can help tell a broader story without complicating the truck itself. A tiny sidewalk made from crumpled paper, a painted curb, or a miniature storefront strip can set context. A row of faux crates or bottled beverages along the base adds a sense of activity, suggesting a functioning stall rather than a static sculpture. Small details like a chalkboard-style menu attached to the side or a single umbrella over the serving window reinforce a narrative that this is a real operating unit. If the display will be photographed, consider a backdrop that complements the color story. A simple gradient wall or a textured curtain can provide depth without overpowering the model.
Guidance from broader resources can be helpful without distracting from the core project. The step-by-step approach you took for construction continues to apply in finishing. You might print or hand-draw a small, simple sign that reads Open or Today’s Special to place above the window. A few careful strokes of white paint next to the branding can create a crisp edge that reads clearly in photos. When you photograph the final piece, adjust the lighting to highlight the textures you created. A gentle rim light from the top or side catches the edges of the banner and lettering, giving the piece a lively, dimensional look. If you plan to display the truck in public, attach non-damaging stands or bases to prevent tipping, and ensure that any projecting bits are secured or trimmed to avoid snagging.
In closing, the finishing touches are not mere decoration; they are the final act of storytelling. Every color choice, every texture, every sign, and every light should contribute to a single, cohesive narrative about the food the truck would serve and the people who would operate it. The cardboard becomes a stage, and the audience takes away a sense of place and possibility. The process rewards patience and iterative refinement. You’ll find that your initial, simple build can bloom into a convincing display with just a touch of texture, a precise sign, and a carefully chosen palette. This is where the project moves from a clever craft to a convincing prop, ready for classrooms, exhibitions, or promotional showcases. And as you gain confidence with these finishing techniques, you’ll discover how adaptable cardboard can be as a storytelling medium. If you want to push this further, explore additional sculptural elements or color studies in future builds, always aiming to maintain the balance between ingenuity and legibility that makes a cardboard display truly memorable.
External resource: How to Make a Cardboard Food Truck – DIY Craft Tutorial (for additional, hands-on demonstration): https://www.youtube.com/watch?v=3ZkX8vQbW2Y
Cardboard on Wheels: Educational Value, Safety, and Real-World Sparks from a DIY Cardboard Food Truck
A cardboard food truck is more than a playful project; it is a compact laboratory where ideas about design, physics, and sustainability come to life. When students or curious makers decide to translate a concept of a moving kitchen into a tangible model, they enter a space where creativity and constraint meet. The cardboard truck invites experimentation with form, weight, balance, and texture while inviting conversation about why certain shapes hold up better than others, why moisture weakens a wall, or how a simple counter can become a believable serving point. Its value rests not in replicating a real vehicle to exacting industry standards but in providing a hands-on environment to explore engineering thinking, visual communication, and material behavior. The act of turning a flat sheet into a three dimensional, transportable display compels builders to anticipate joints, weight distribution, and the way forces travel through a structure. In that sense, a cardboard food truck acts as a miniature but meaningful scaffold for learning that translates into more ambitious projects later, whether a more durable mockup, a school display, or a playful promotional prop for a local event.
The material itself frames the learning. Corrugated cardboard is light yet surprisingly supportive when properly layered and reinforced. It also carries a responsibility: it is susceptible to moisture and wear, so the builder must plan for resilience even if the final display is purely decorative. That tension between fragility and strength becomes a practical lesson. By choosing the right thickness, layering, and edge treatments, learners discover how to convert a simple sheet into a space that can hold a small menu board, a toy cash register, or a decorative sign without collapsing. This introduces a core engineering principle—strength through strategic geometry and material choice. The process naturally nudges builders toward questions about redundancy and safety: where should joints be reinforced, how many layers are needed to prevent sagging, and what kind of fasteners will keep a counter from detaching when a pretend customer touches it?
Education thrives in environments that reward problem solving. In the cardboard truck, those opportunities are abundant. A learner can think about 3D modeling by drawing a plan on paper, cutting out the pieces, and then testing how they fit together before gluing or taping. This hands on approach bolsters spatial reasoning as design shifts from flat drawings to a dimensional object. It also sharpens planning skills. Builders must anticipate how the truck will come together, create a cut list, and manage materials within a fixed budget of cardboard sheets and tape. The exercise mimics real world project work in a scaled-down, approachable way. It also can tease out differences between idealized shapes and the realities of material behavior. For instance, a long, flat side can be strong if reinforced with internal supports, but it might buckle if the edges are left unbraced during assembly. Recognizing these subtleties trains a learner to think in terms of load paths and stable connections—a foundational concept in structural design.
The act of turning the cardboard into a recognizable vehicle also builds visual literacy. A working model helps translate branding ideas into physical space. Even a small cardboard donut truck, a popular type of themed build, demonstrates how curves, color, and signage communicate identity. A simple painted surface can convey mood just as effectively as a professionally wrapped trailer, if the colors and typography are chosen with intent. In this way, the project merges design thinking with practical craft. The soft edges of paper and cardboard invite experimentation with textures that evoke metal panels, brick facades, or retro signage. Builders can simulate weathering, add a faux glass window, or crinkle a piece of cardboard to mimic a corrugated metal surface. These touches are not mere decoration; they teach the importance of visual cues in storytelling and branding, even on a small, temporary display.
Beyond aesthetics, the cardboard truck becomes a venue for discussing sustainability and resource reuse. The project foregrounds the idea that materials we often discard can be repurposed into something functional and expressive. This fosters conversations about lifecycle thinking: what counts as waste, how to maximize reuse, and what steps ensure that a model remains safe and presentable for the duration of a show or classroom session. In a world where school projects and community events increasingly emphasize eco friendly practices, cardboard-based builds offer a concrete demonstration of how design decisions align with environmental values. The learning grows when a student questions how long a model lasts in a given setting, or how to protect adhesives from humidity without sacrificing the project’s clean lines. These considerations sharpen environmental stewardship and practical planning alike.
Safety emerges as a central thread in any cardboard build, especially when the project sits in a classroom, a school hallway, or a public display. Cardboard itself is non toxic, which makes it a suitable material for young builders. Yet the tools required to cut and shape it—scissors, box cutters, and utility blades—demand responsible handling. The lesson here is not fear but discipline. Adult supervision, proper tool use, and clear guidelines for cutting away from the body help prevent injuries. In addition, safety planning includes choosing clean, uncontaminated cardboard to avoid health risks during handling. A simple precaution is to inspect each piece for signs of moisture damage, mold, or lingering odors that could compromise the experience. The craft of reinforcing joints with tape or glue reduces the likelihood of sudden collapses during demonstrations or indoor events, where kids may press lightly on a pretend serving counter or open pretend doors. The simplified physics of a cardboard truck is not only about balance and weight; it is about building a culture of care and attention that stays with learners long after the model is taken apart or stored.
In practice, assembling a cardboard food truck follows a familiar arc: a careful design phase, a methodical cut list, and a disciplined joining strategy. Builders begin by sketching a basic truck silhouette on the cardboard, outlining the main body, the roof, a serving counter, and a few signature details such as windows or an awning. If a template from online resources is available, it can provide accurate proportions and a reliable starting point. The goal is not to achieve museum grade realism but to translate an idea into a tangible structure that captures the essence of a food truck and can withstand a few friendly hand interactions during a display. The next step is to cut out each panel and reinforce the frame by taping along all edges and joints. It is often helpful to assemble the sides, front, and back into a box-like frame first, then add the top and any extra elements. The wheels, which are typically decorative in a cardboard build, can be represented with foam sheets, rolled paper tubes, or simple circular cutouts attached with sturdy tape or skewers as axles. The result is a believable, portable exhibit with playful character rather than a precise replica.
A range of detailing options can enrich the final piece. A serving counter can be created from a reinforced panel with a small lip to simulate a workspace for a pretend cashier. An awning adds a sense of depth and movement, especially if it can tilt or swing slightly to mimic a real canopy. Signage—hand drawn or printed—offers a moment to practice typography and layout, inviting learners to consider how color and word choice affect readability from a distance. For texture, builders can crumple small scraps of cardboard and glue them in layered patterns to evoke metal panels or brickwork without needing specialized materials. Such texture work teaches how surface variety changes perception, which matters for both aesthetics and readability of signage at a distance. A well textured, colorful model can feel alive and serve as a memory trigger for a classroom discussion about design choices and audience communication.
The practical applications of cardboard trucks extend beyond a single classroom or a school fair. These models serve as affordable, rapid prototyping tools for marketing campaigns, pop up events, or promotional displays. A cardboard model can echo a brand’s identity in a lightweight, reusable way, offering a tactile experience that static posters cannot. In some cases, teams use cardboard prototypes to test concepts before committing to metal or fiberglass builds, gaining insights into space allocation, counter height, and traffic flow around the display. Because the materials are inexpensive and easy to modify, the cardboard truck becomes a flexible test bed for brainstorming sessions, where participants can swap out signage or adjust the height of the serving counter to see what looks and feels best. This approach aligns with broader lessons about product development and user experience testing, showing how early, low risk experiments can inform later, high investment decisions. The power of cardboard here lies in its simplicity: its very ordinariness invites experimentation without fear of wasting precious resources or time.
To connect the craft to broader planning and professional practice, consider how a cardboard truck can be integrated into a larger educational arc. The project can become a gateway to discussions about branding and identity, where learners translate a rough concept into a coherent, visual system. They can connect the cardboard model to a larger display by considering a real world display script: how the model will be presented, what kind of signage is visible from a distance, and how the colors convey mood and taste. This is where a reference to industry thinking through accessible, classroom friendly channels becomes valuable. For those who want a structured pathway, a helpful step is to look at resources that guide choices about a truck model and how to align build choices with your goals. For a practical starting point, see Choosing the right food truck model. This link offers a concise framework for deciding what form your cardboard truck should take depending on the learning objectives, space constraints, and audience expectations. It is a reminder that even a simple cardboard project can serve as a bridge to more complex design challenges, and that thoughtful planning can turn an education oriented craft into a meaningful exploration of form, function, and audience impact.
As the project nears completion, the final touches tie the entire concept together. Color becomes a storytelling device, and the brush marks or marker lines on the sides can communicate movement, personality, and culinary identity. A small, hand drawn menu board is not only decorative; it can function as a teaching tool about information hierarchy and clarity. The process of documenting the build—photographs, measurements, and reflective notes—emphasizes that the cardboard truck is a learning artifact whose value increases when it is analyzed and documented. The model becomes a record of inquiry: what worked, what did not, and how did constraints shape outcomes? In this way, the cardboard truck demonstrates the iterative nature of design practice and invites learners to repeat the process with new themes or at higher levels of complexity.
For makers who want to push the boundaries of what cardboard can do, the real payoff lies in how the completed model sparks curiosity and conversation. It can be a centerpiece at a community event, a classroom demonstration, or a temporary display that invites visitors to imagine a small business in action. The cardboard truck becomes a catalyst for discussion about service design, customer engagement, and the practical considerations of running a food operation, even if only as a visual simulation. The project is accessible, repeatable, and scalable, which makes it a strong entry point for students who are exploring engineering, art, and environmental stewardship in one cohesive pursuit. And because the materials are forgiving and the process is transparent, beginners gain confidence as they see their own ideas take shape in 3D form. In the end, the cardboard food truck offers more than a cute prop; it provides a platform for learning that sticks—and, perhaps more importantly, it demonstrates that thoughtful design can begin with the humble box on a table and grow into something that feels real enough to dream about future possibilities.
For a visual walkthrough of related techniques and a more granular walk through, see this step by step video: https://www.youtube.com/watch?v=3ZkX8vQbW2Y.
Final thoughts
A cardboard food truck isn’t just a prop; it’s a portable classroom and community ambassador. By selecting sturdy materials, designing with future-proof joints, adding personality through color and signage, and leaning into the educational and safety applications, you transform a simple box into a dynamic, reusable asset. Whether you’re planning a corporate event, a neighborhood festival, or a school project, this approach encourages collaboration, eco-conscious choices, and hands-on problem-solving. The final takeaway: with the right balance of planning, craftsmanship, and play, your cardboard truck can spark connection, creativity, and celebration wherever you roll.